Overview
Kelviq’s checkout system:- Powers your sales - Collect payments and create customer subscriptions
- Integrates with Stripe - Uses Stripe as the payment processor
- Highly configurable - Control plans, pricing, trial periods, and more
- Multi-currency ready - Support customers worldwide
- Easy to embed - Generate links for any product and plans
Generating Checkout Links
Checkout links are generated at the product level. Each link can include one or more plans.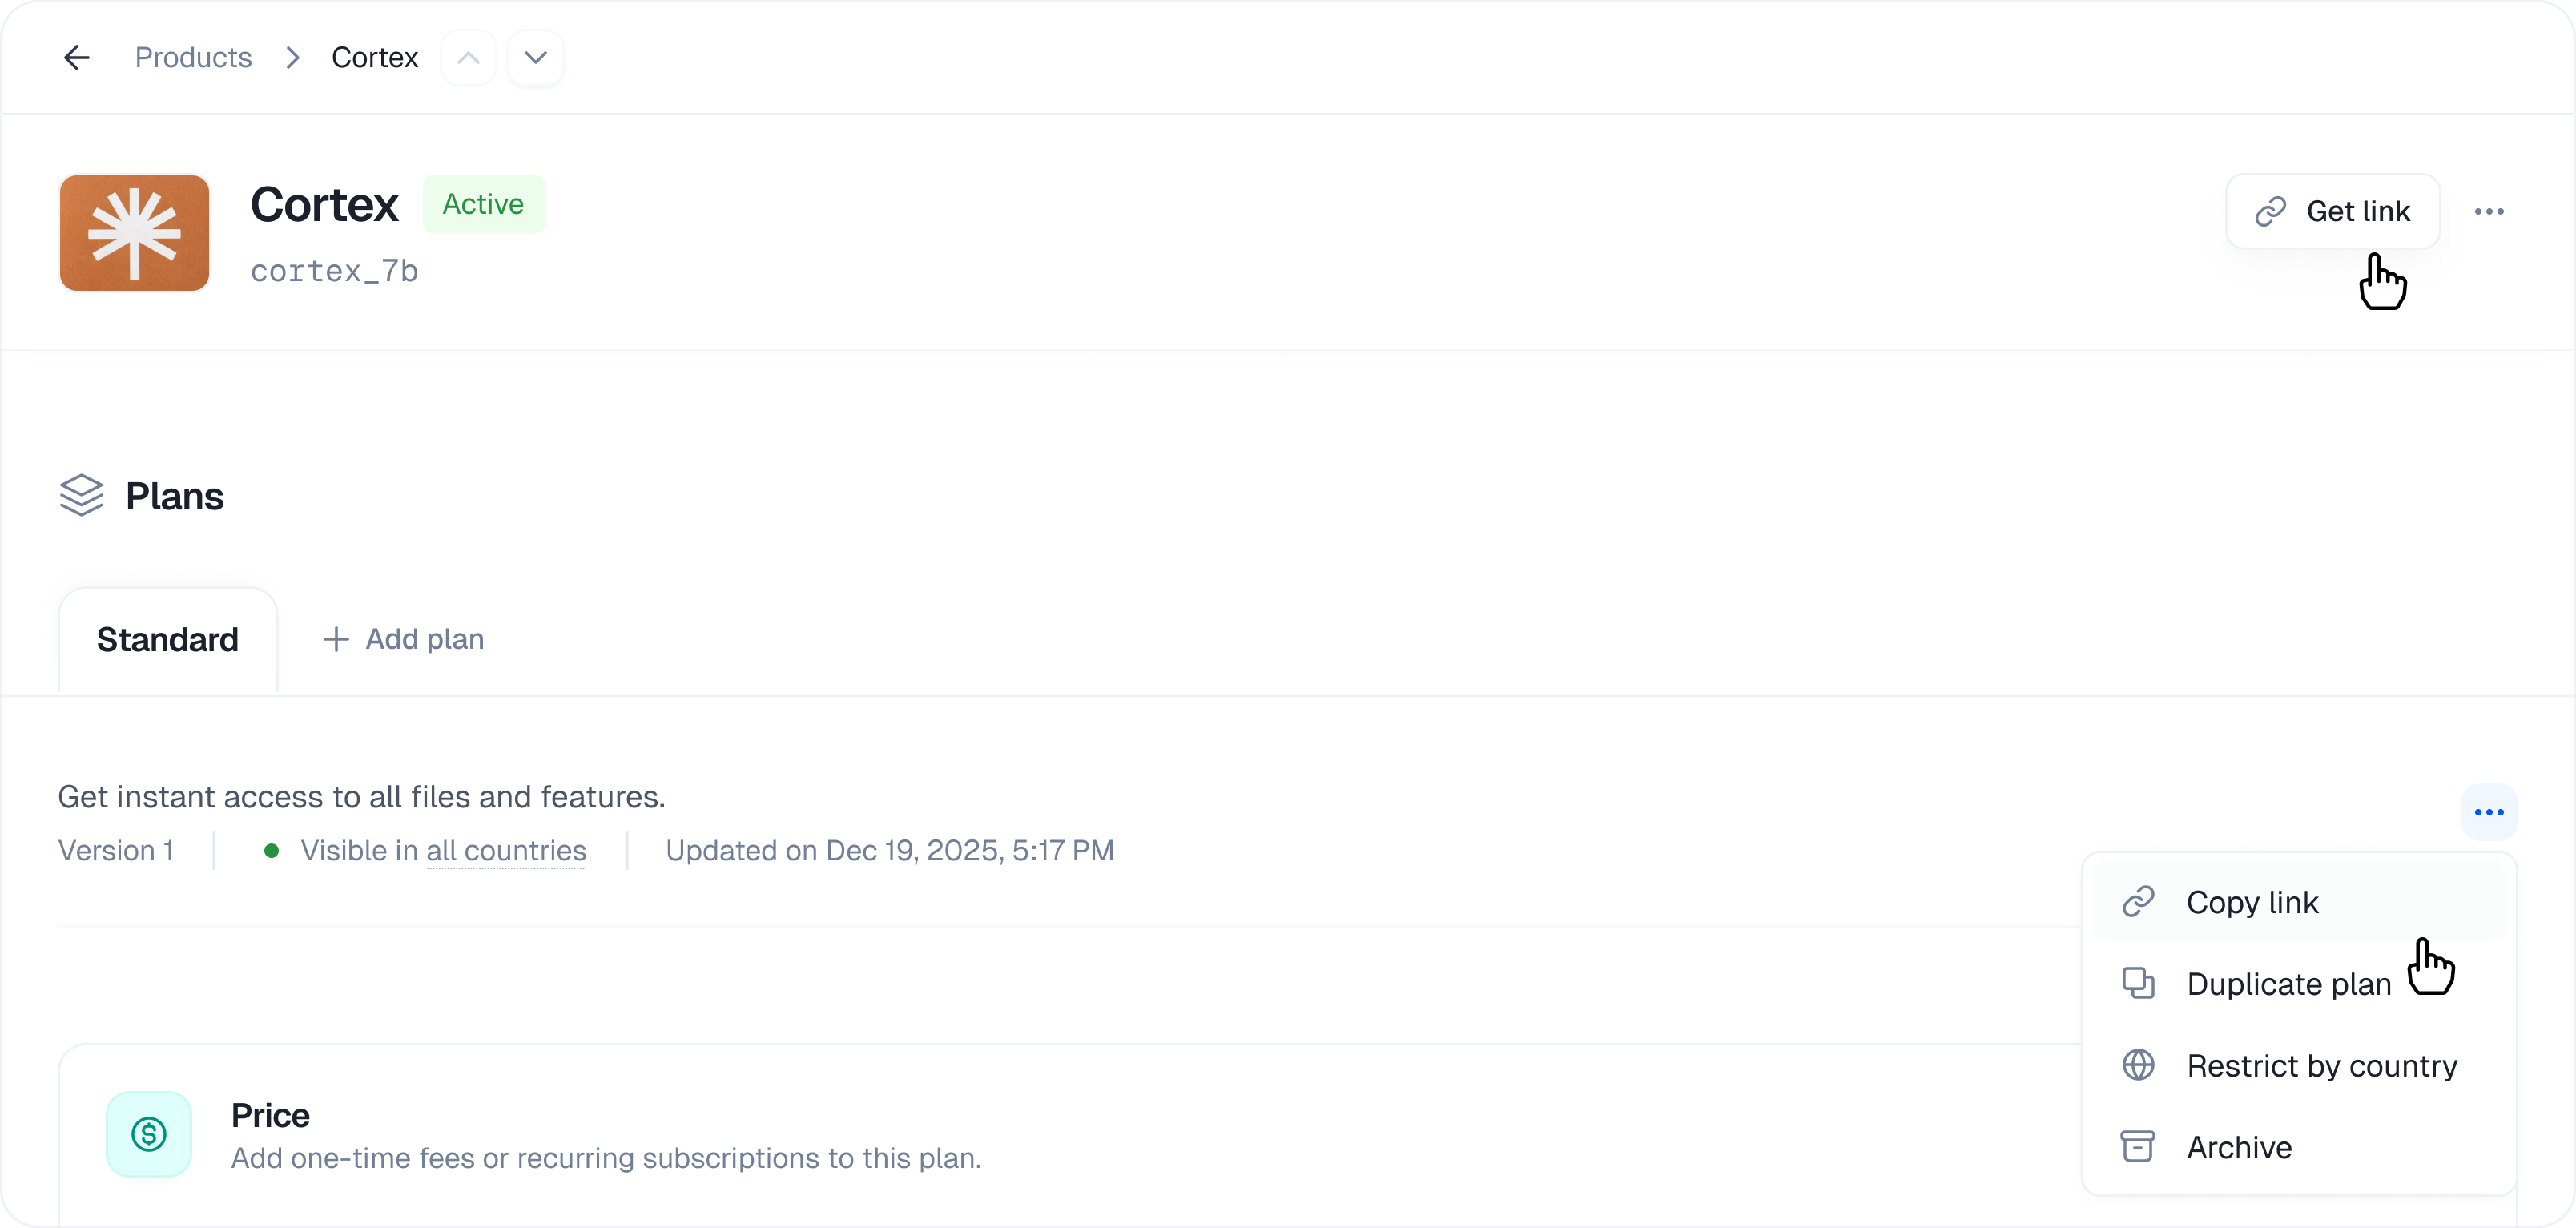
Quick Start
- Go to Products → Select your product
- Click “Generate Checkout Link” → Opens the link builder
- Select plans → Choose which plans to include
- Configure options → Set defaults and features
- Copy link → Share with customers
Link Format
Generated checkout links follow this pattern:Multi-Plan Checkout
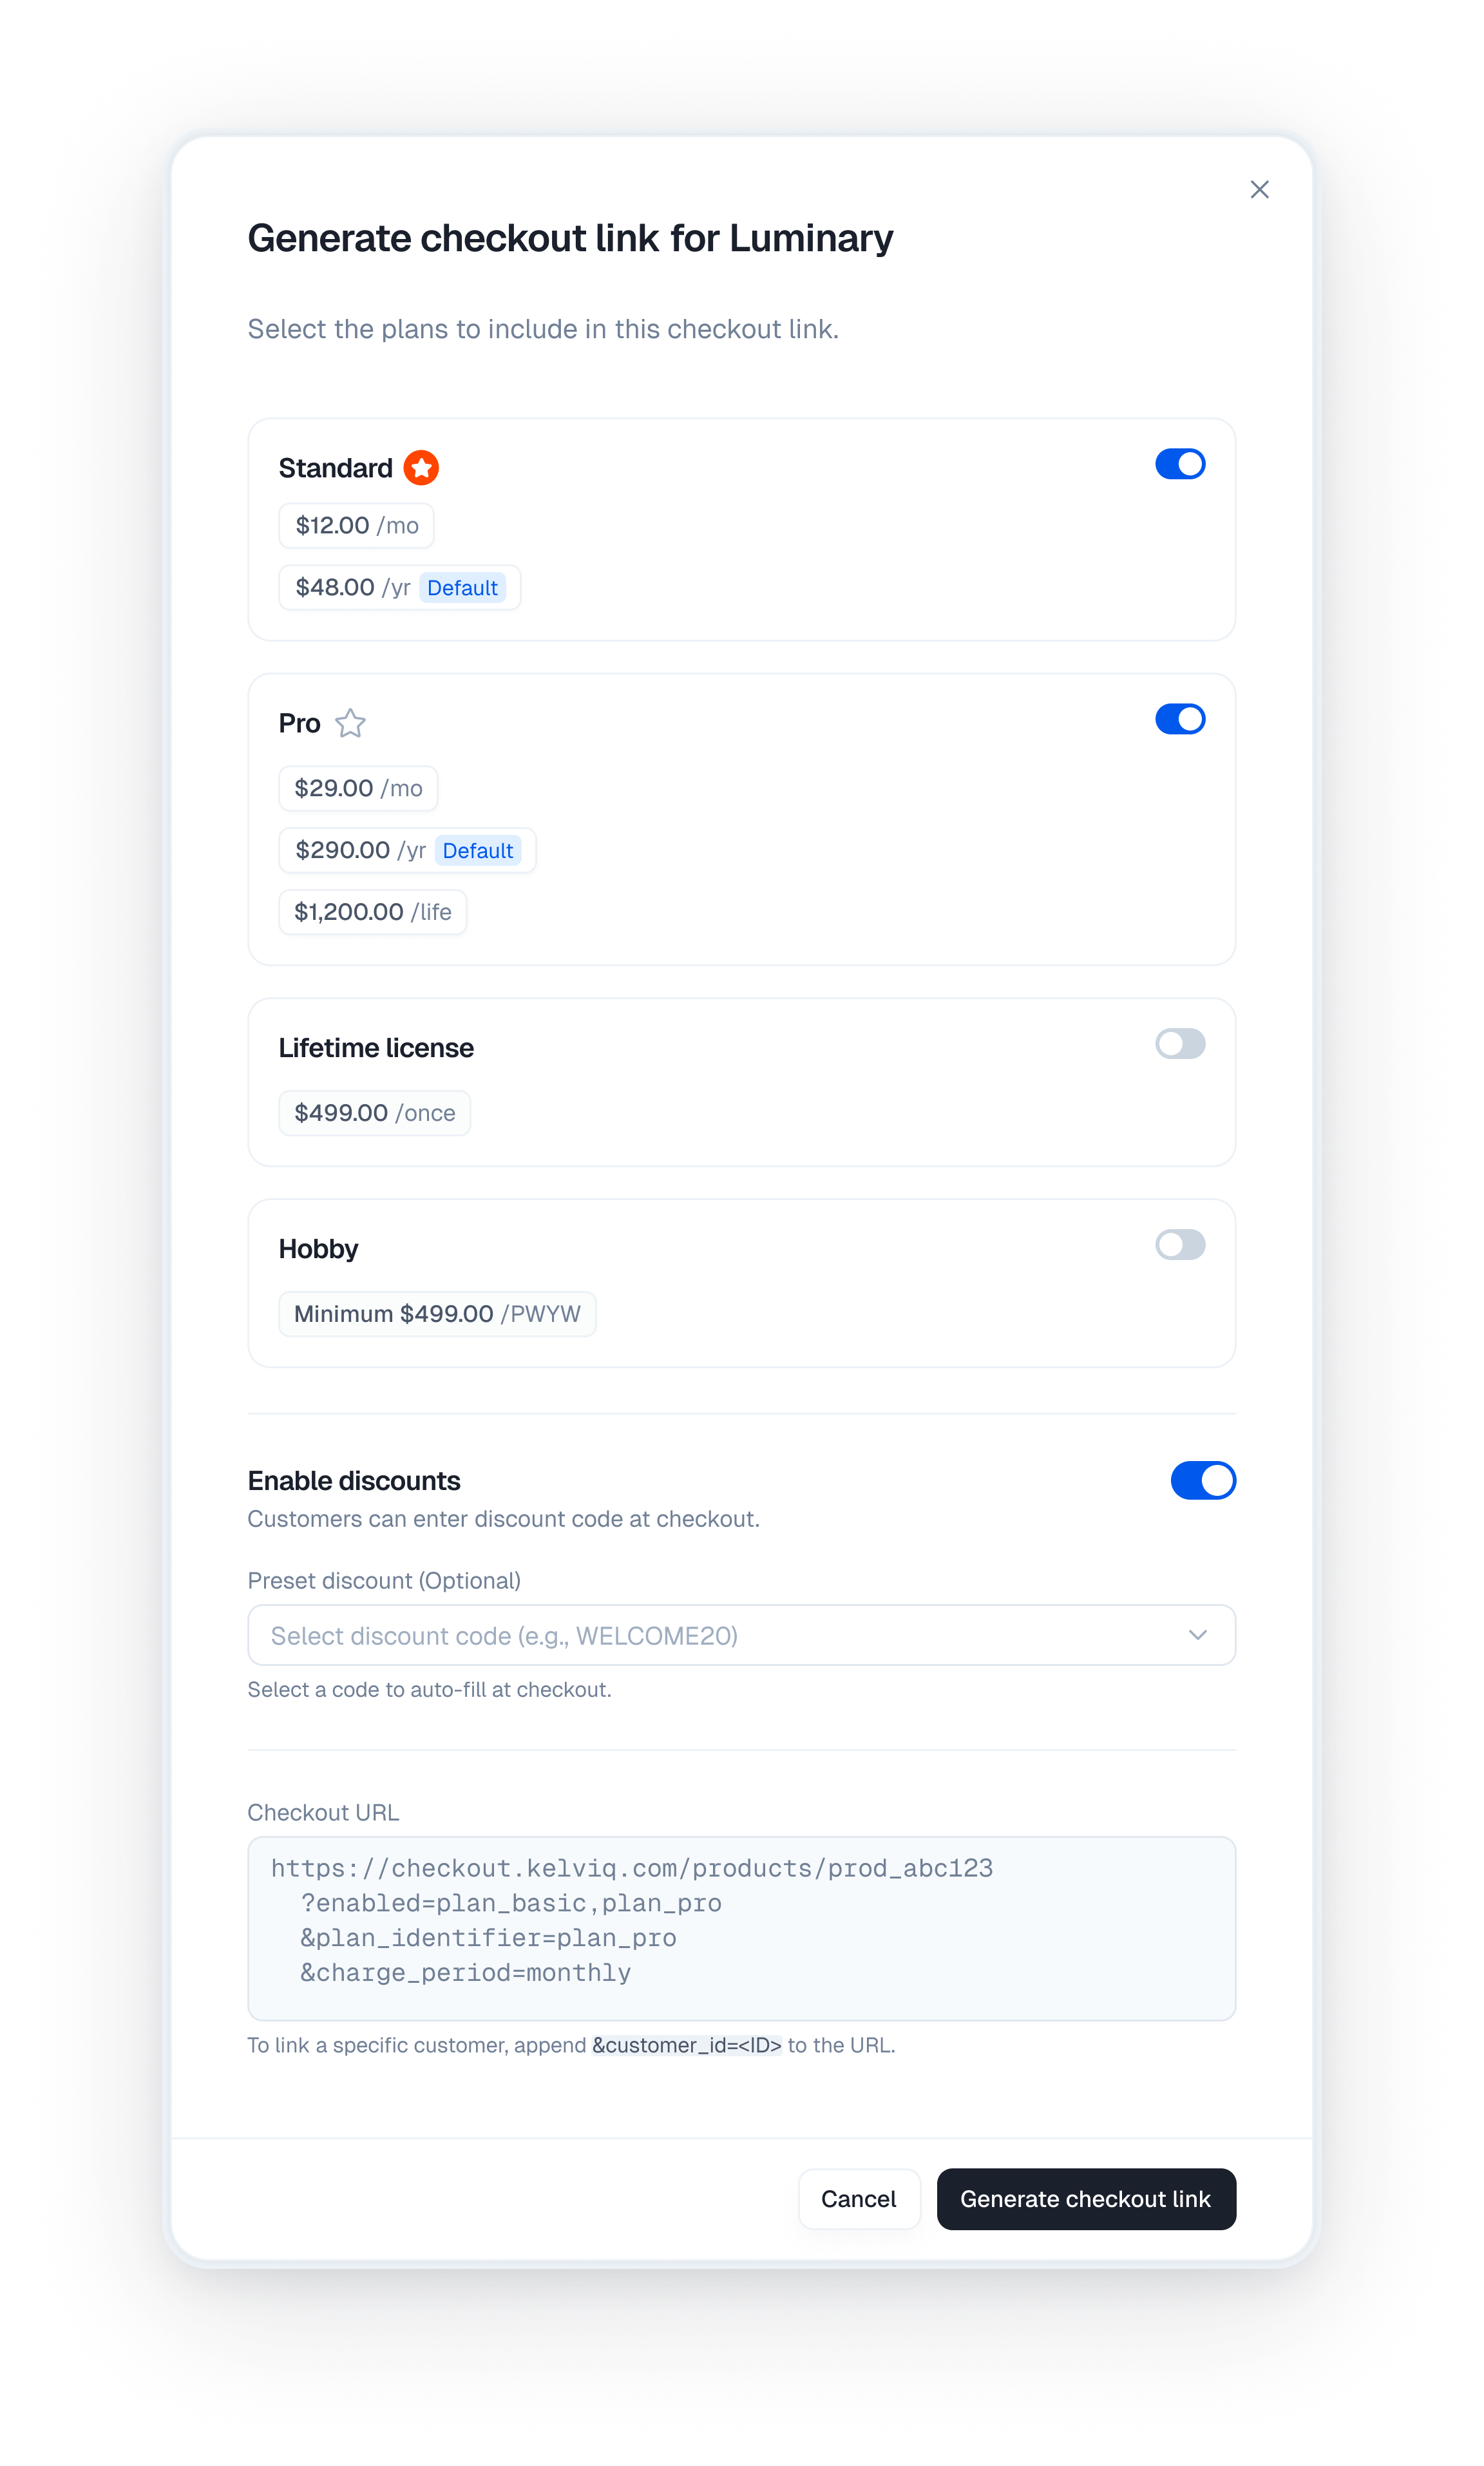
Include multiple plans in a single checkout to let customers choose their tier.Configuration
Plans Configuration
- Select which plans are enabled (shown to customer)
- Choose a recommended plan (highlighted by default)
- Cannot disable all plans
- Disabled plans don’t appear in checkout
Example: Multi-Plan Pricing
Your product has 3 plans: Free, Pro, EnterpriseBilling Periods & Pricing
Supported Billing Periods
Plans in Kelviq can support multiple billing periods:| Period | Duration | Use Case |
|---|---|---|
| Monthly | 1 month | Recurring subscriptions |
| 3 Months | 3 months | Quarterly billing |
| Yearly | 12 months | Annual billing, often with discounts |
| One Time | One-off payment | Digital products, courses, lifetime access |
Setting Default Billing Period
Configure which billing period is pre-selected for each plan:Pricing by Period
Different plans can have different pricing for the same period:Free Trials
Offer free trial periods before charging customers.Configuring Trials
- Open your plan → Go to the plan’s pricing section
- Enable Free Trial → Toggle the trial option
- Set duration → 1-365 days (default 30)
- Save plan
Trial Behavior
When a customer starts a trial:Trial Configuration Example
Advanced Checkout Configuration
Custom Return URL
After checkout succeeds, redirect customers to your custom URL:Discount Code Integration
Allow customers to apply discount codes at checkout: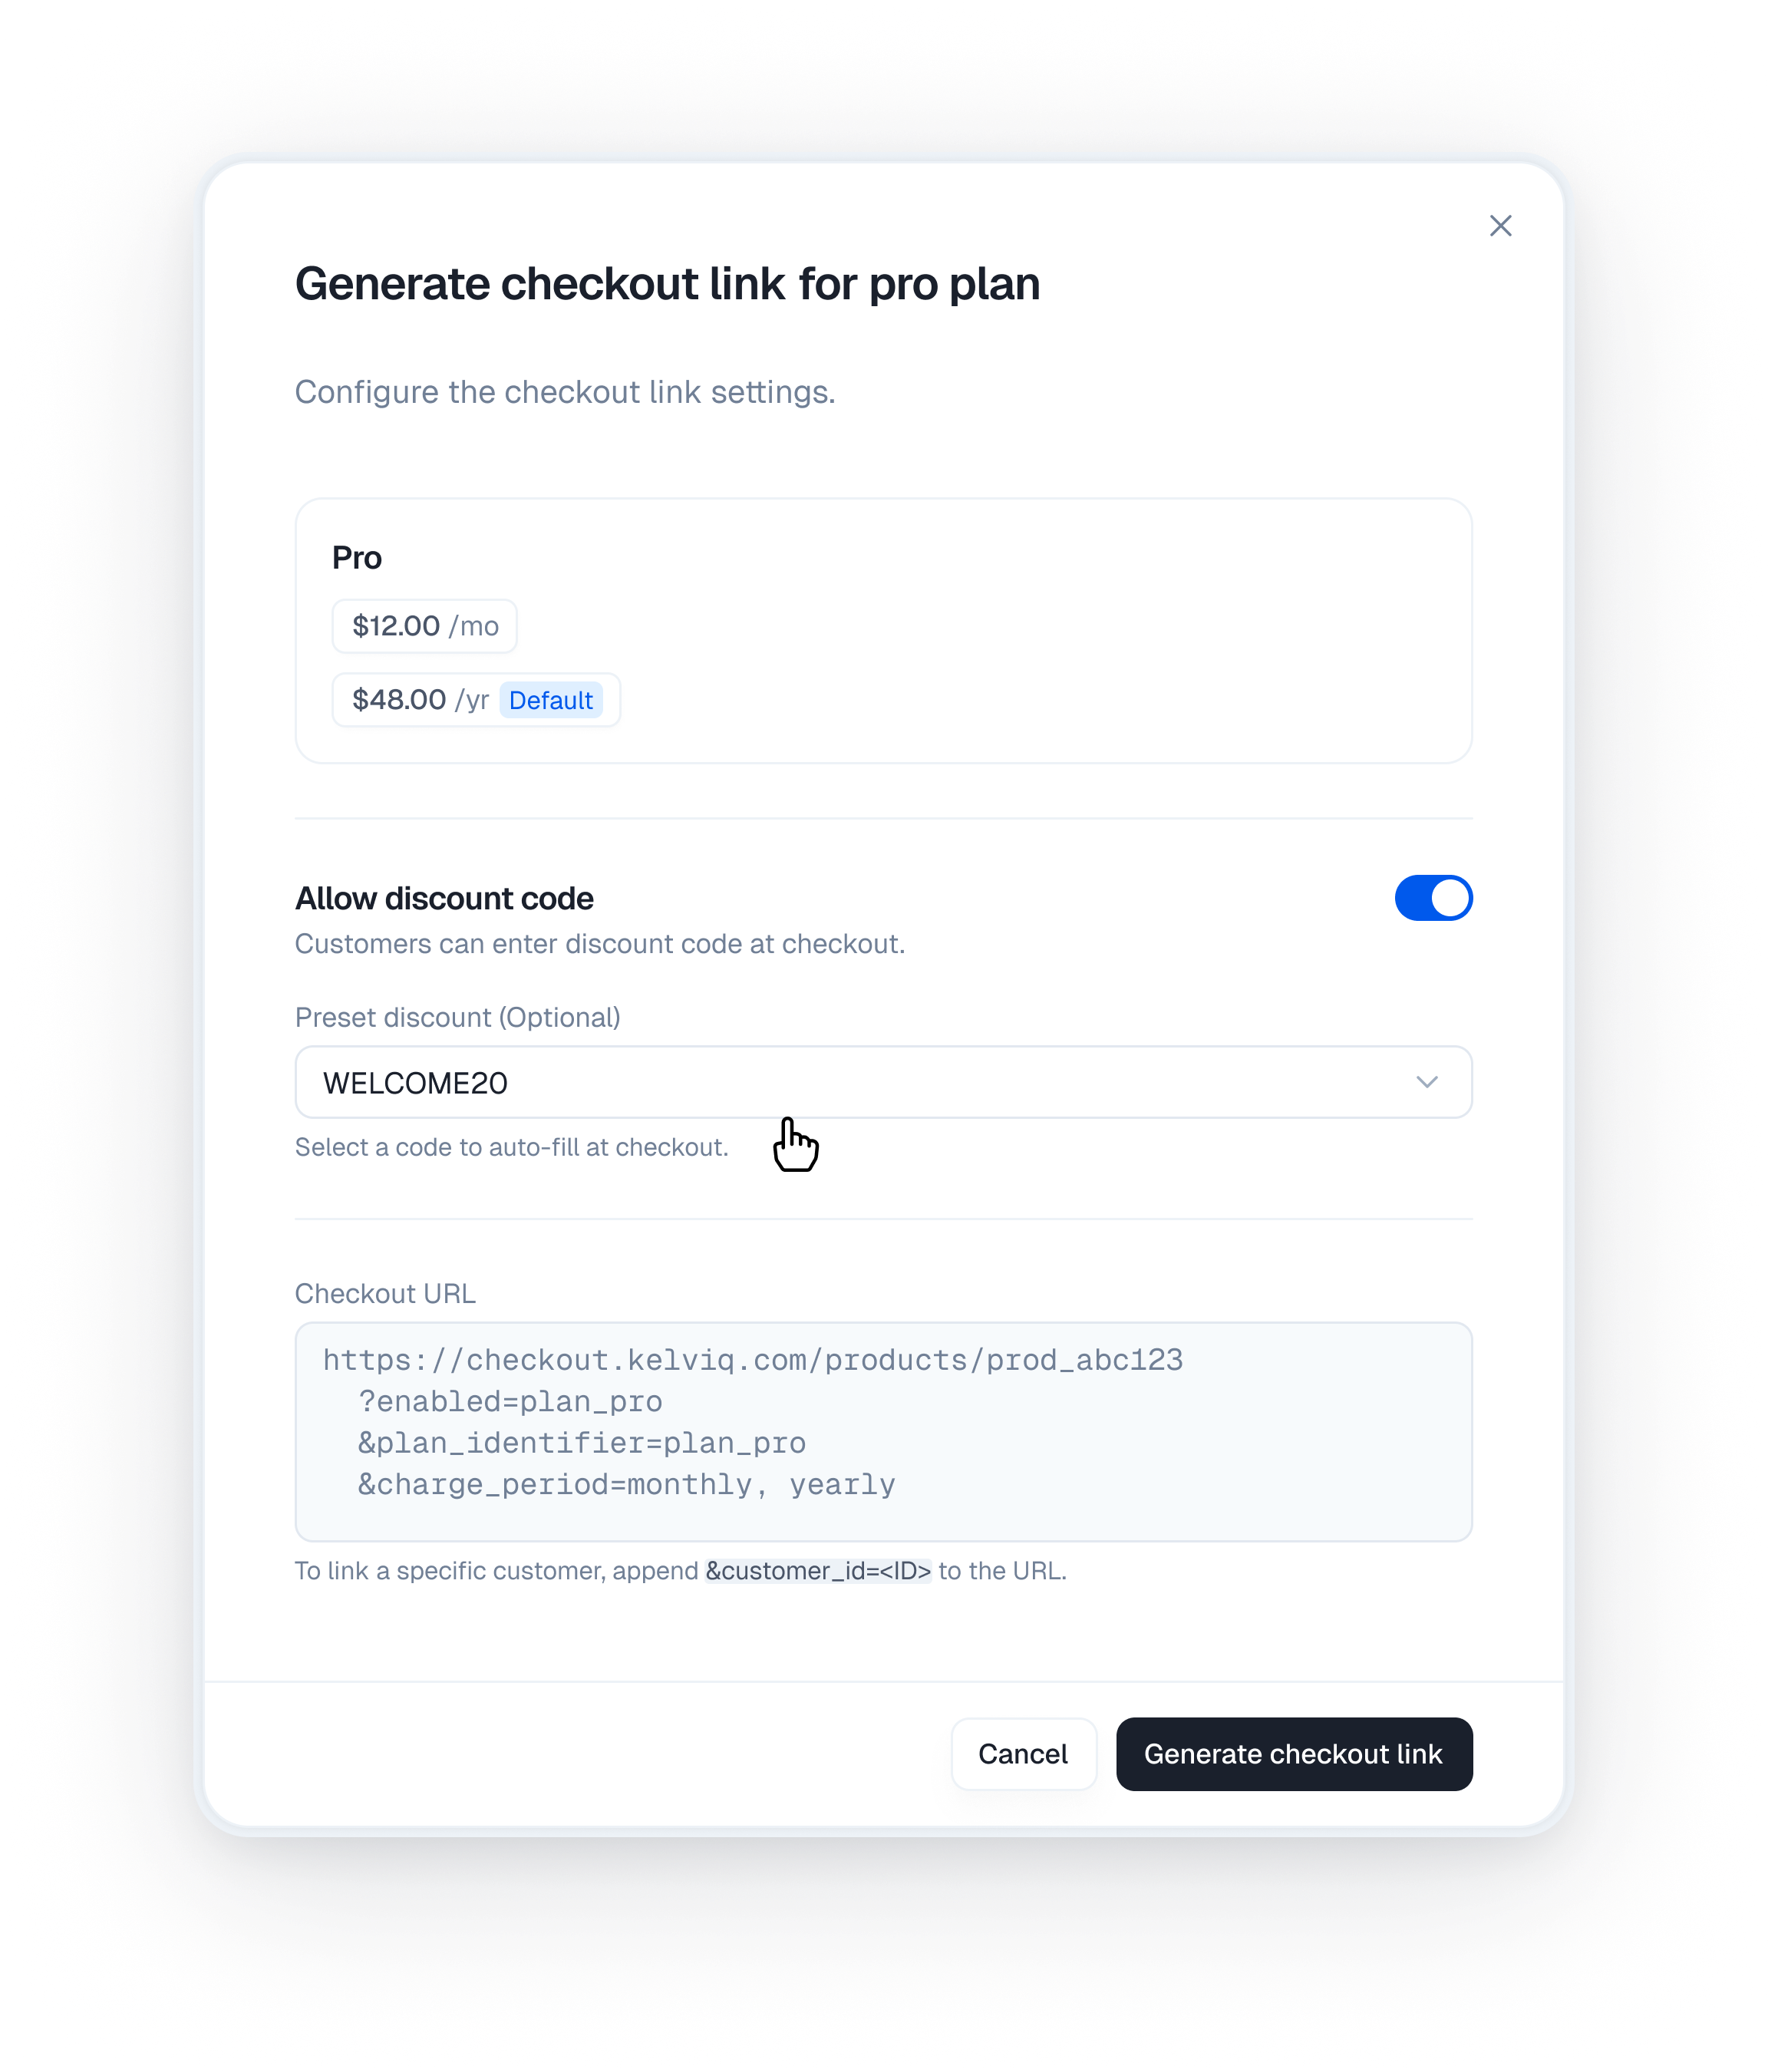
Tax Collection
Kelviq can collect and handle taxes: Tax ID Collection:- Customers can enter their tax ID (VAT number, EIN, etc.)
- Used to determine applicable taxes
- Required for some jurisdictions
- Enable/disable tax collection per product
- Taxes are calculated based on customer location and tax ID
Country Restrictions
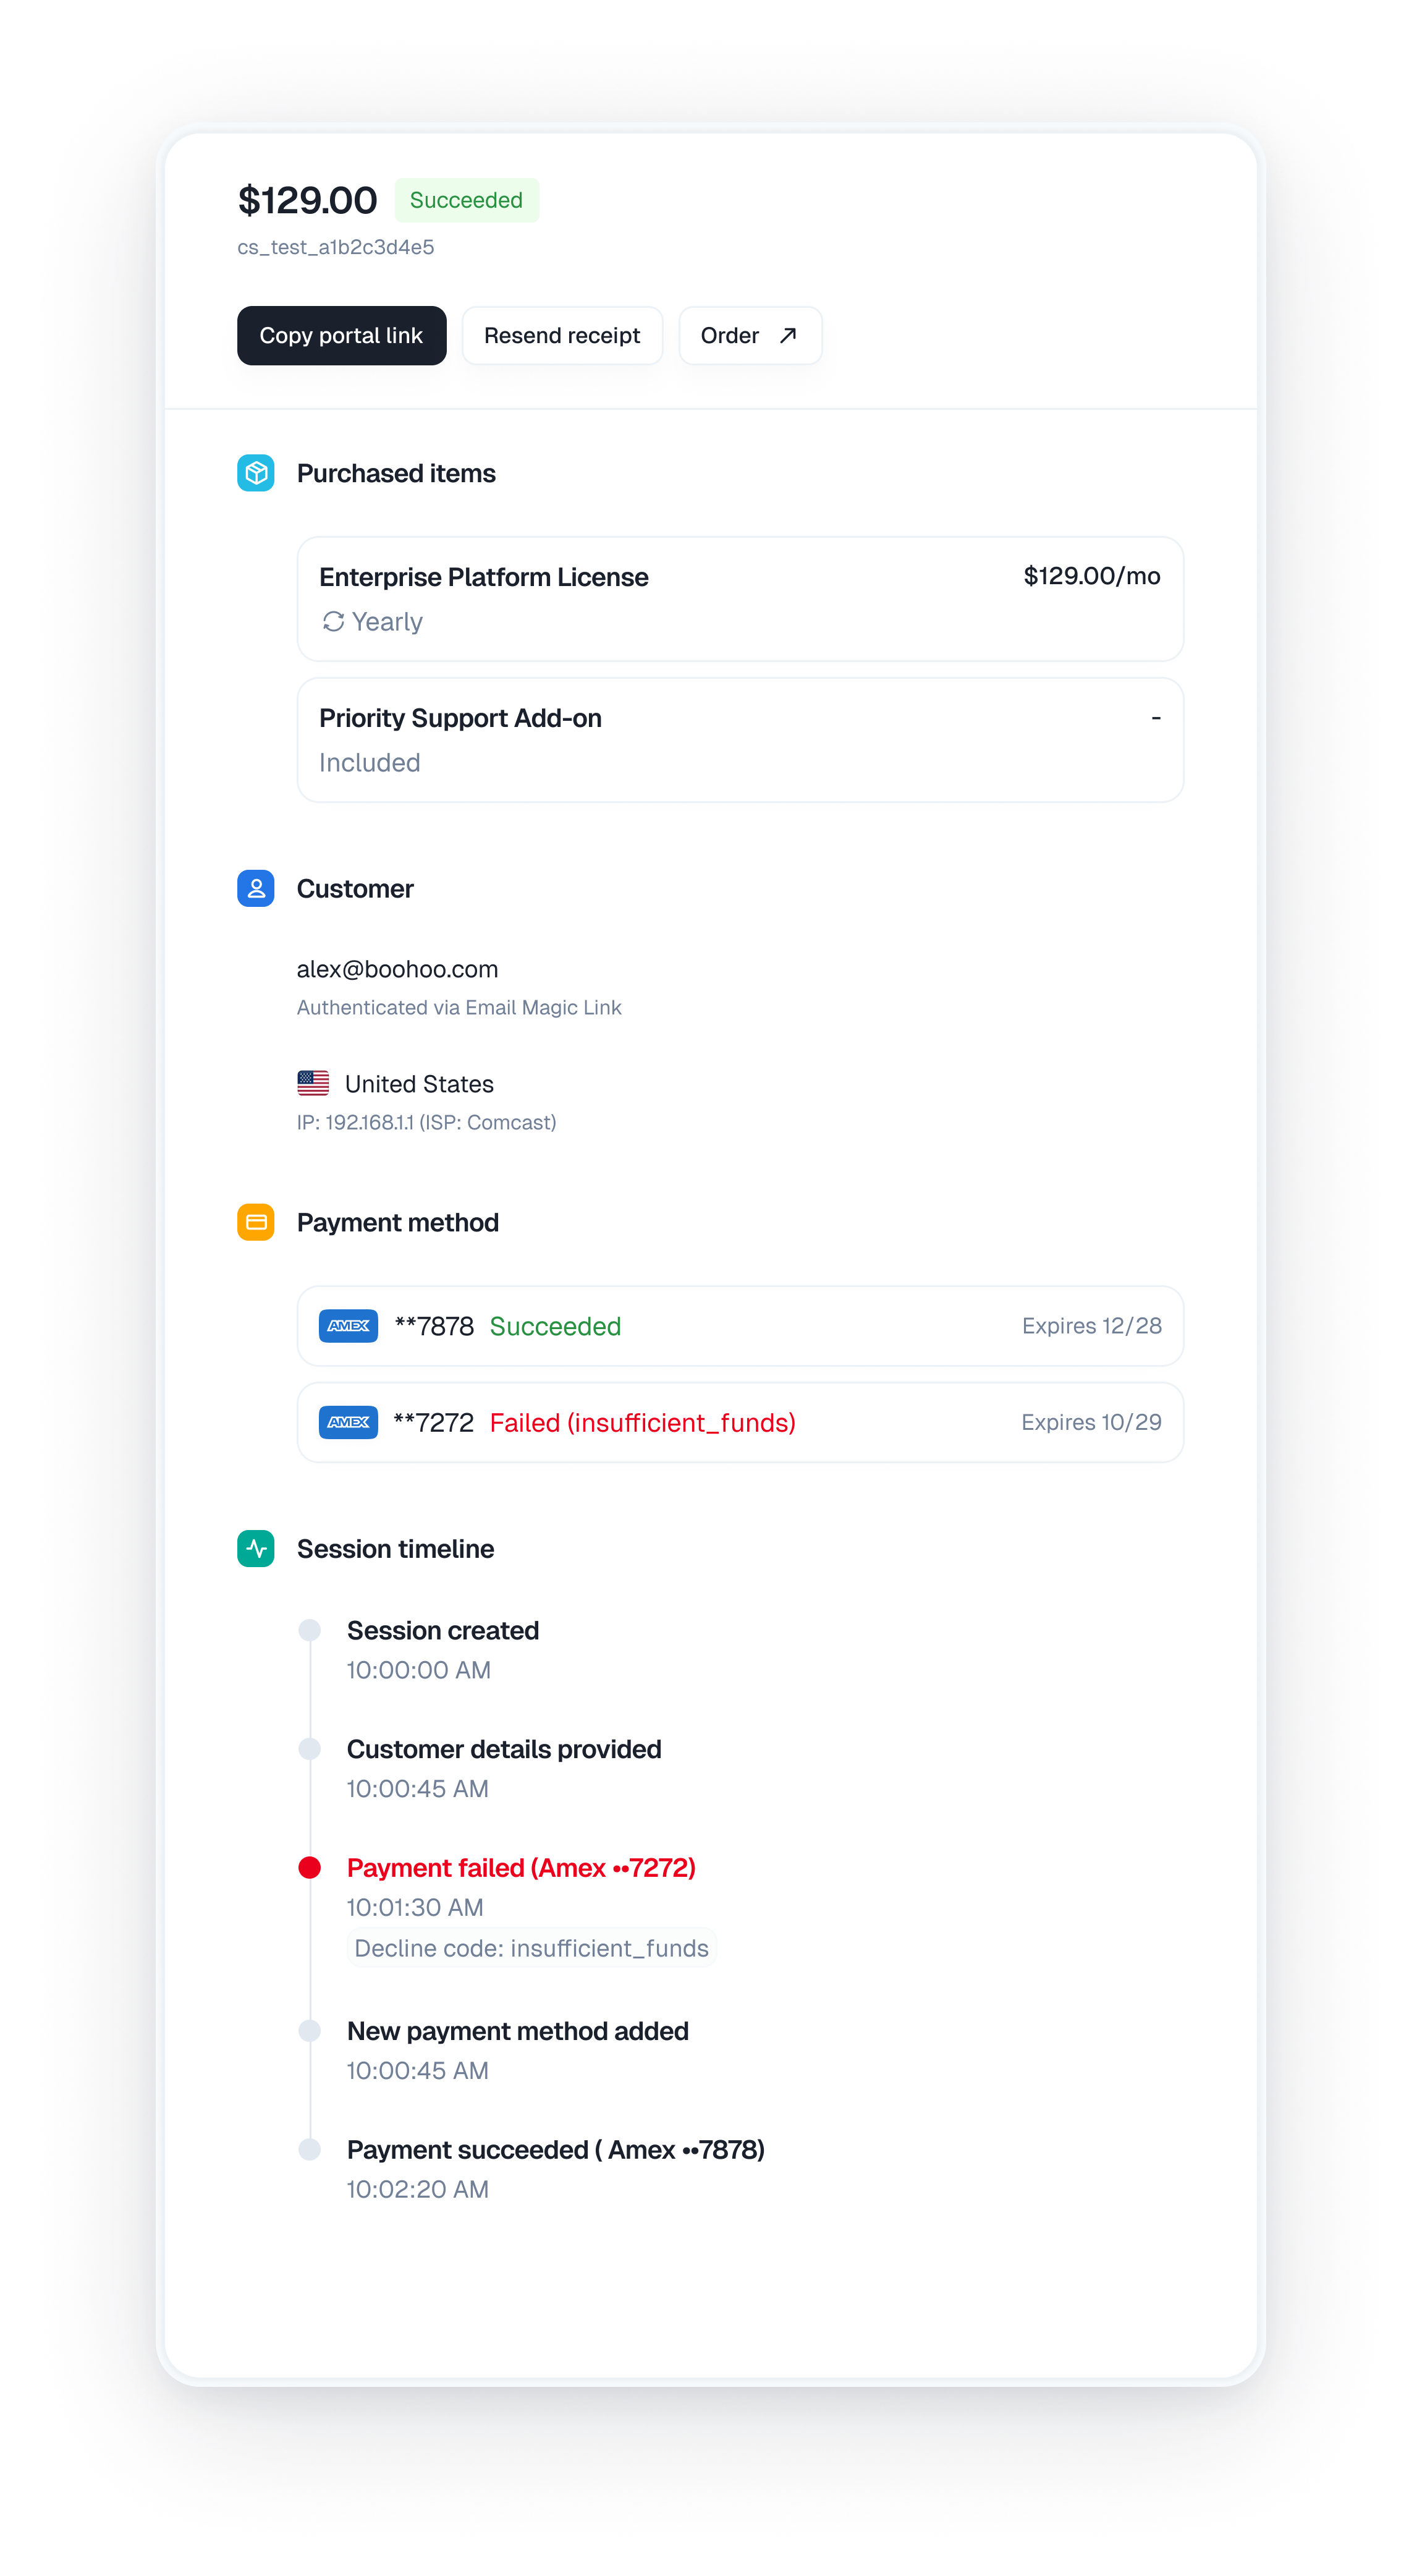
Restrict plans to specific countries:Checkout Session Lifecycle
Checkout sessions track the state of each checkout attempt:Session States
Monitoring Checkouts
View checkout sessions in the dashboard: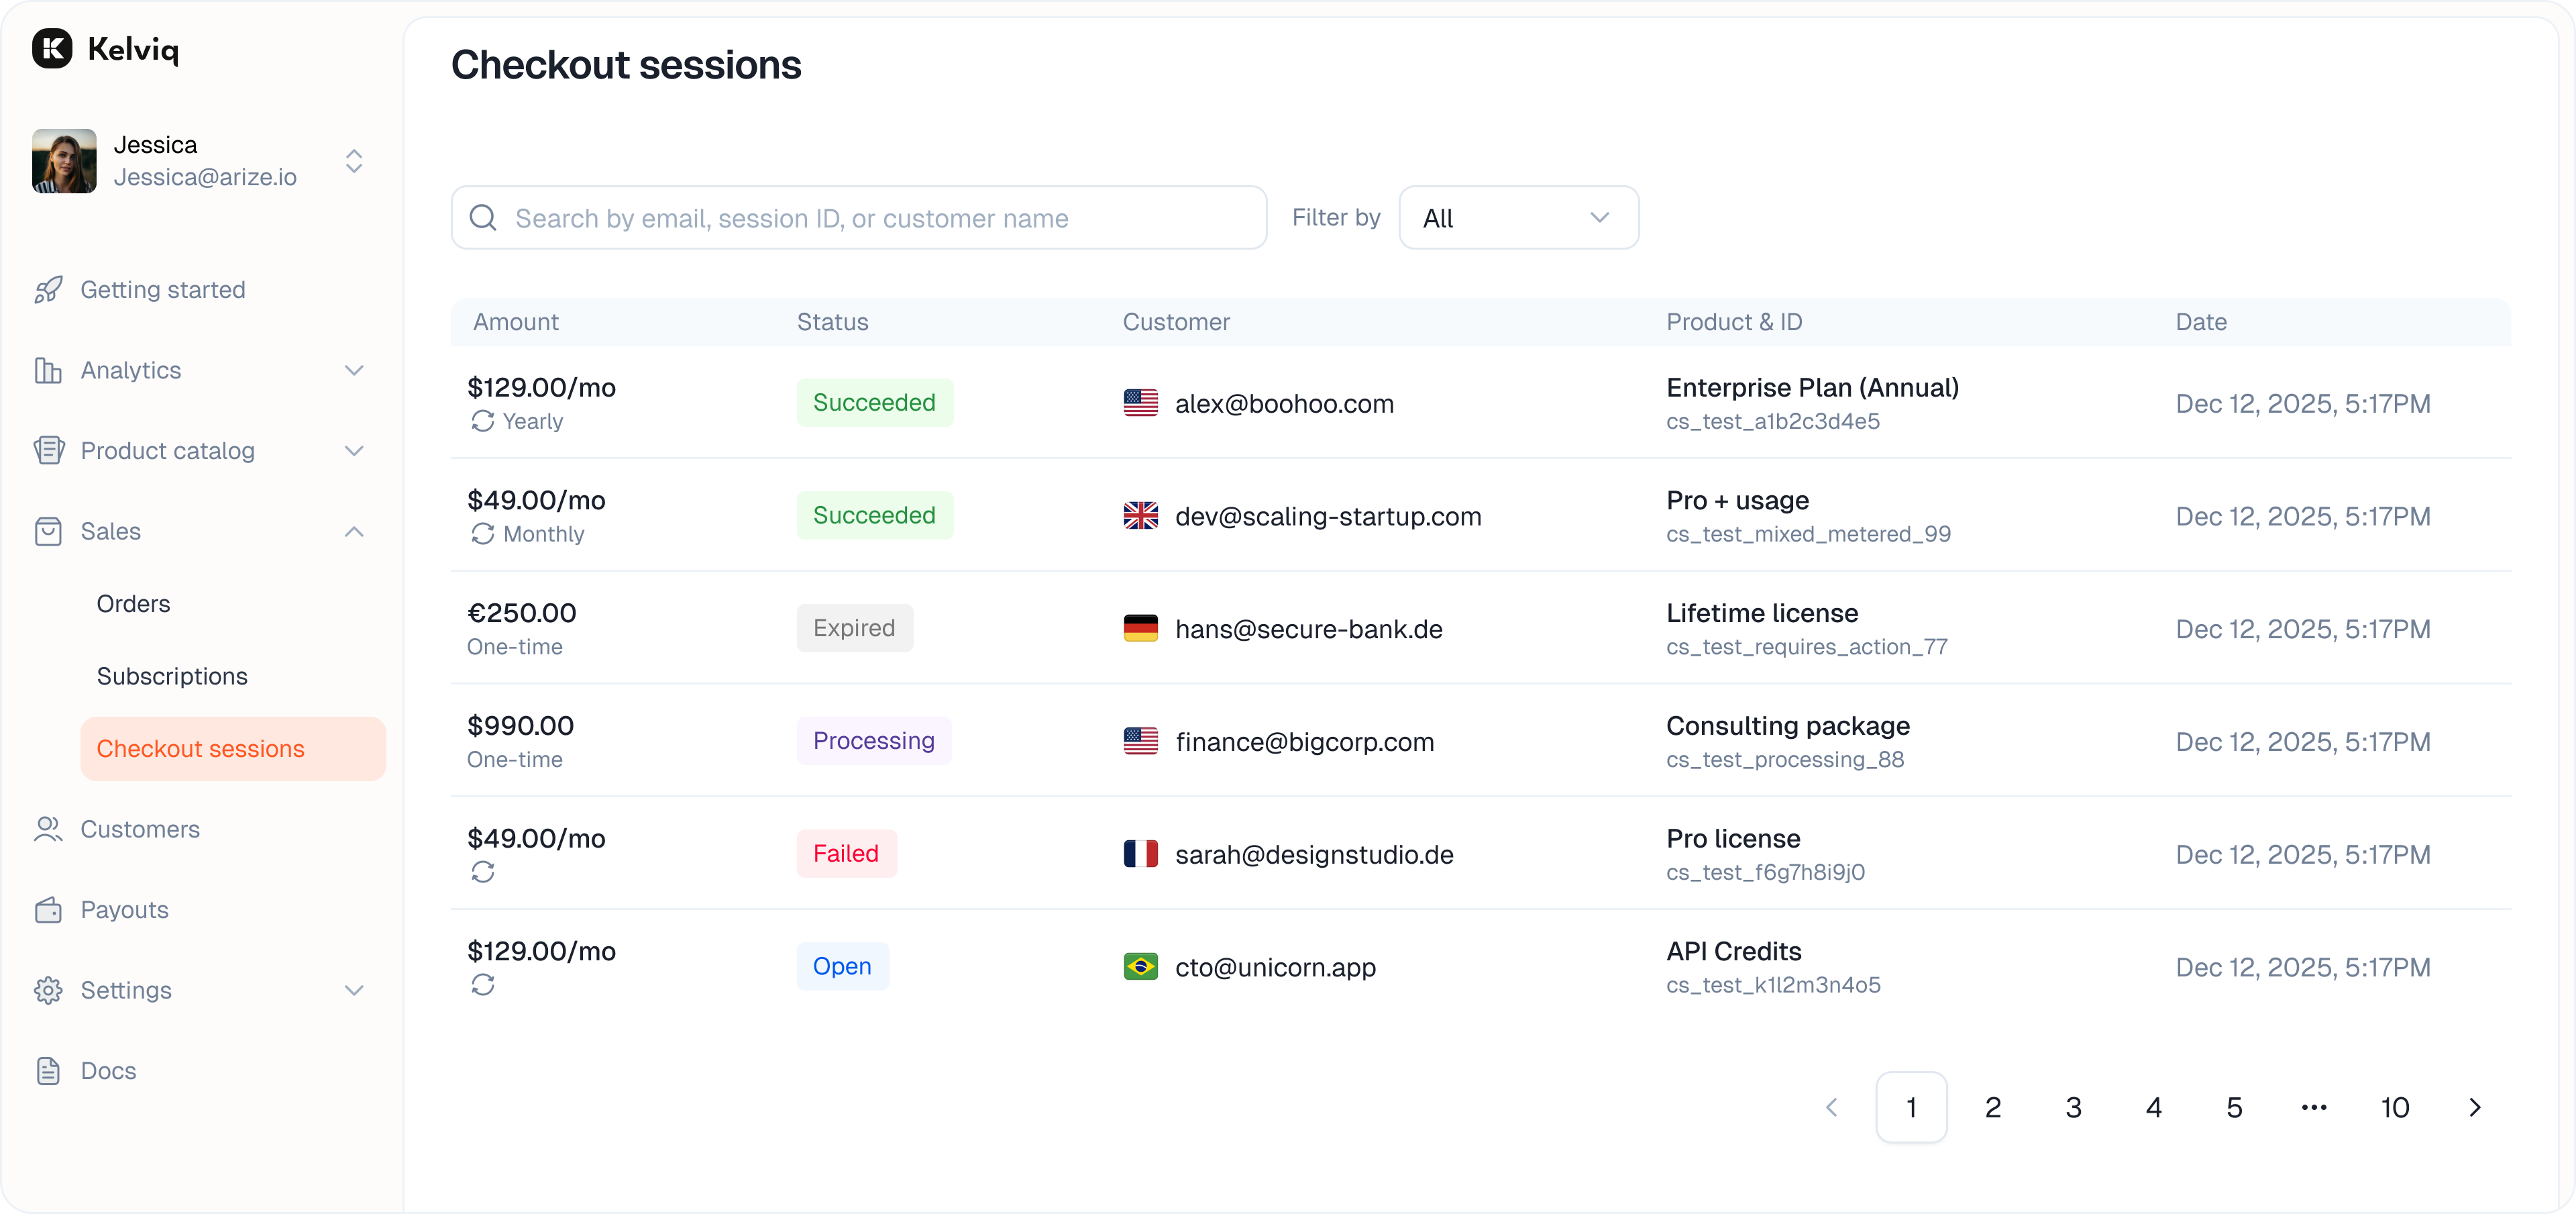
- Go to Sales → Checkout sessions
- View sessions → See all active and completed checkouts
- Filter by status → Open, Success, Closed, Expired
- Conversion metrics → Track conversion rates
Create Checkout Sessions via API
You can programmatically create checkout sessions using the SDK:- Python
- Node.js
Checkout Flow Examples
Example 1: Simple Product
One plan, one price:Example 2: Tiered Plans
Multiple plans, multiple billing periods:Example 3: Free + Paid
Offer free plan with paid upgrades:Payment Methods
Kelviq uses Stripe as its payment processor. Stripe supports:- Credit/Debit Cards - Visa, Mastercard, American Express, Discover
- Digital Wallets - Apple Pay, Google Pay
- Bank Transfers - ACH, SEPA, etc. (regional)
- Local Methods - iDEAL, Bancontact, Giropay, EPS (regional)
Payment method availability depends on customer location and Stripe’s local support. Cards are universally supported.
Currency & Localization
Multi-Currency Support
Prices are stored per currency. When customers checkout:Pricing Configuration
Set prices for each currency you support:Regional Pricing
Offer different prices based on customer location (PPP - Purchasing Power Parity):Testing Checkout
Sandbox Testing
Test checkouts without processing real payments:- Use Stripe test cards → Use 4242 4242 4242 4242
- Test various scenarios → Successful payment, declined card, etc.
- Monitor test checkouts → View in your dashboard
Test Card Examples
| Card | Result |
|---|---|
| 4242 4242 4242 4242 | Successful payment |
| 4000 0000 0000 0002 | Card declined |
| 4000 0025 0000 3155 | Requires authentication |