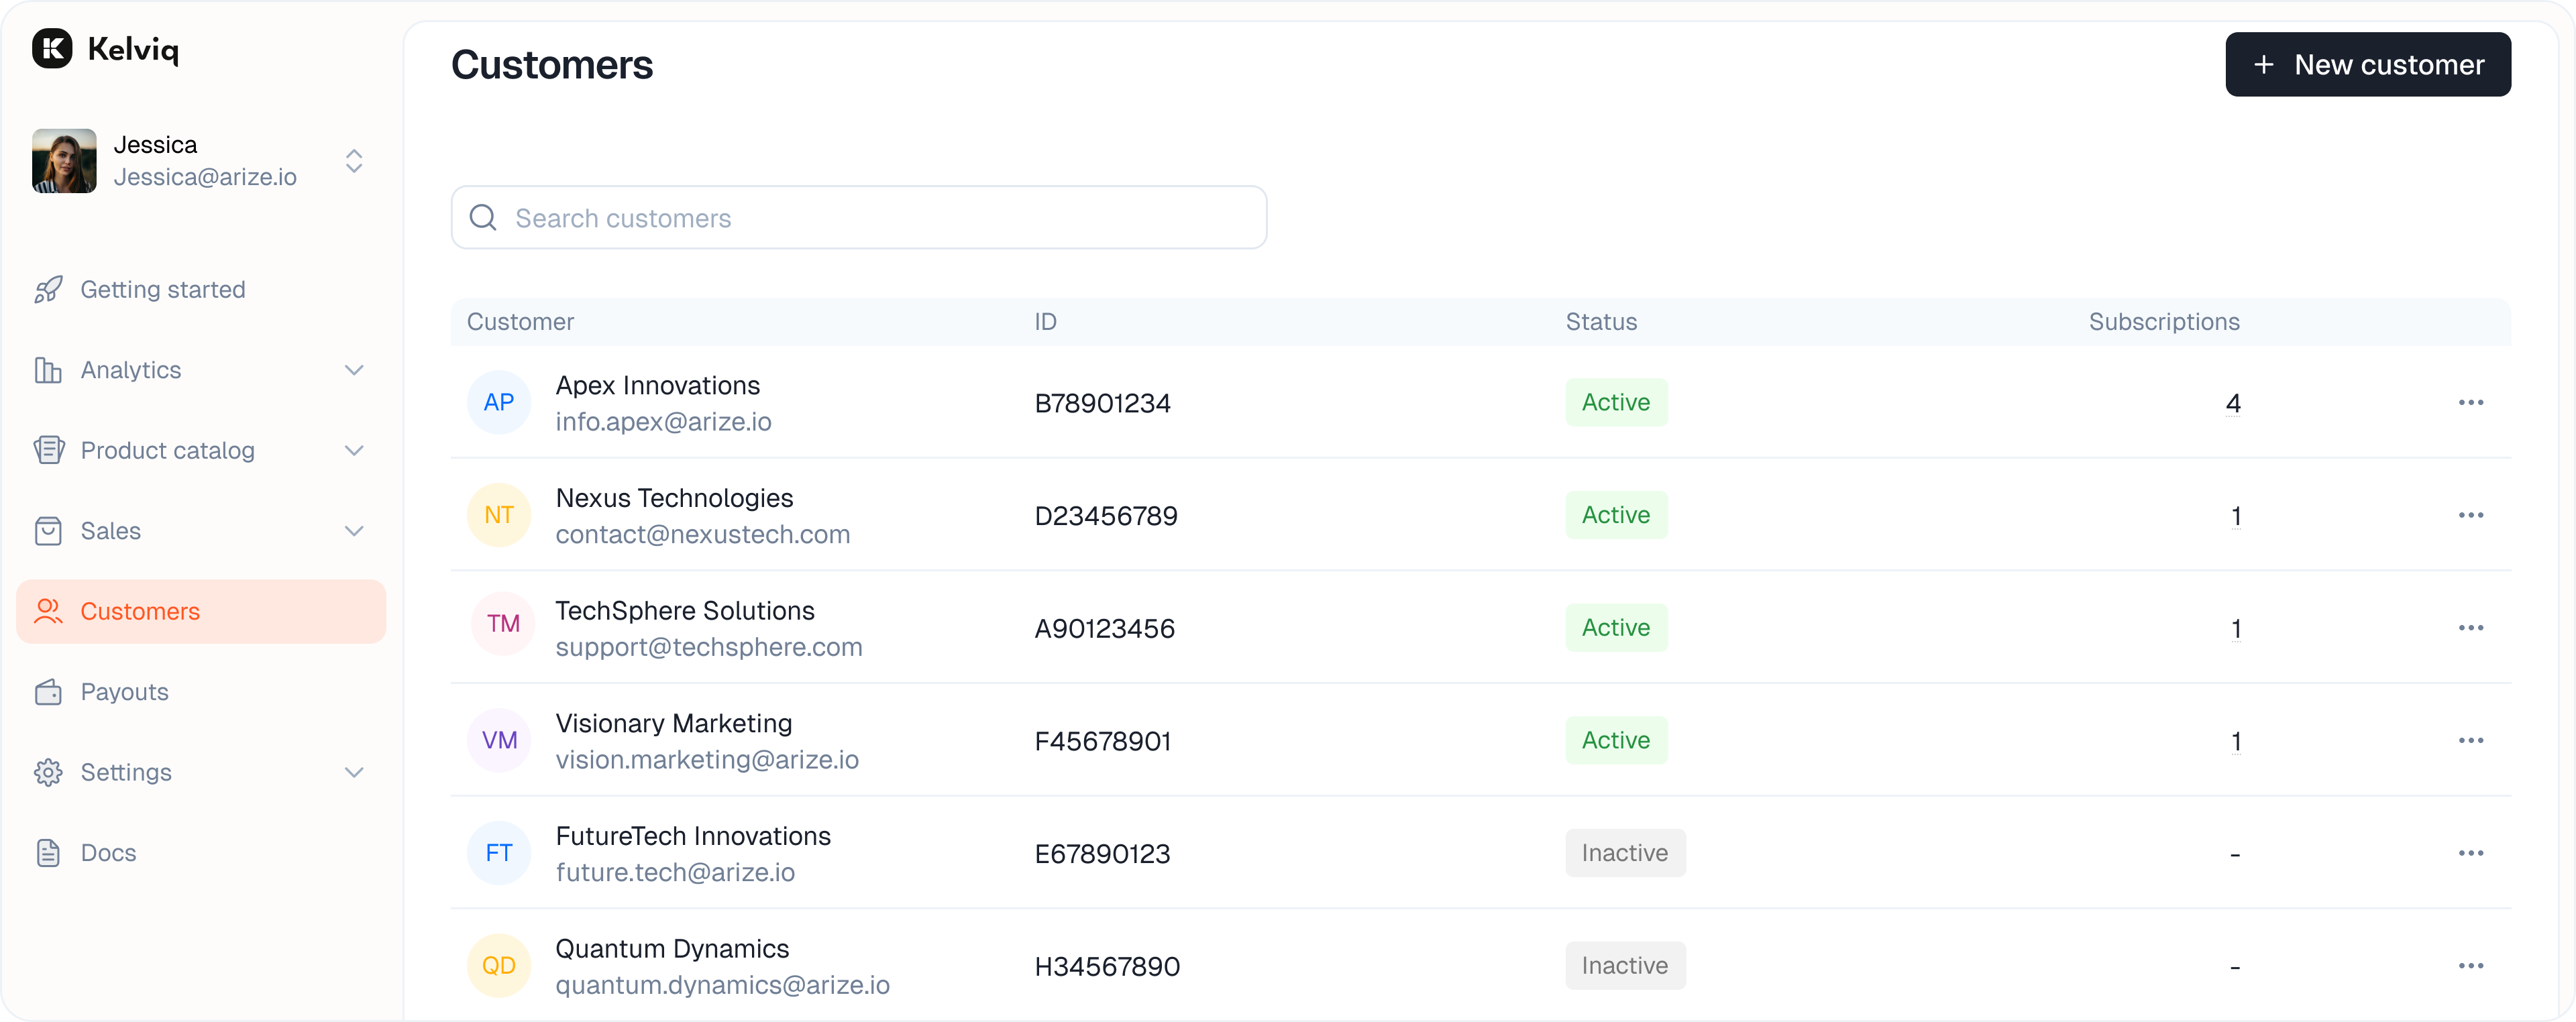
View customer list
Select Customers in the main navigation to see your list. You can do a few things here.- Search by name, email, or identifier.
- Add a new customer with the button in the top right.
- Manage a customer by clicking their row to see details.
Add a new customer
You can create records manually.Fill in details
You need to provide a few key pieces of info.
- Customer name is required. Use the person’s full name or company name.
- Identifier is the unique ID the API uses. We auto-generate this based on the name, but you can edit it. Linking this to the ID in your own database is usually a good idea.
- Email address is optional.

Manage existing customers
You can edit details or revoke access from the list view.Edit a customer
Click the three dots on the right side of the customer row and select Edit.
Archive a customer
Archiving makes a customer inactive and revokes their access. Click the three dots and select Archive.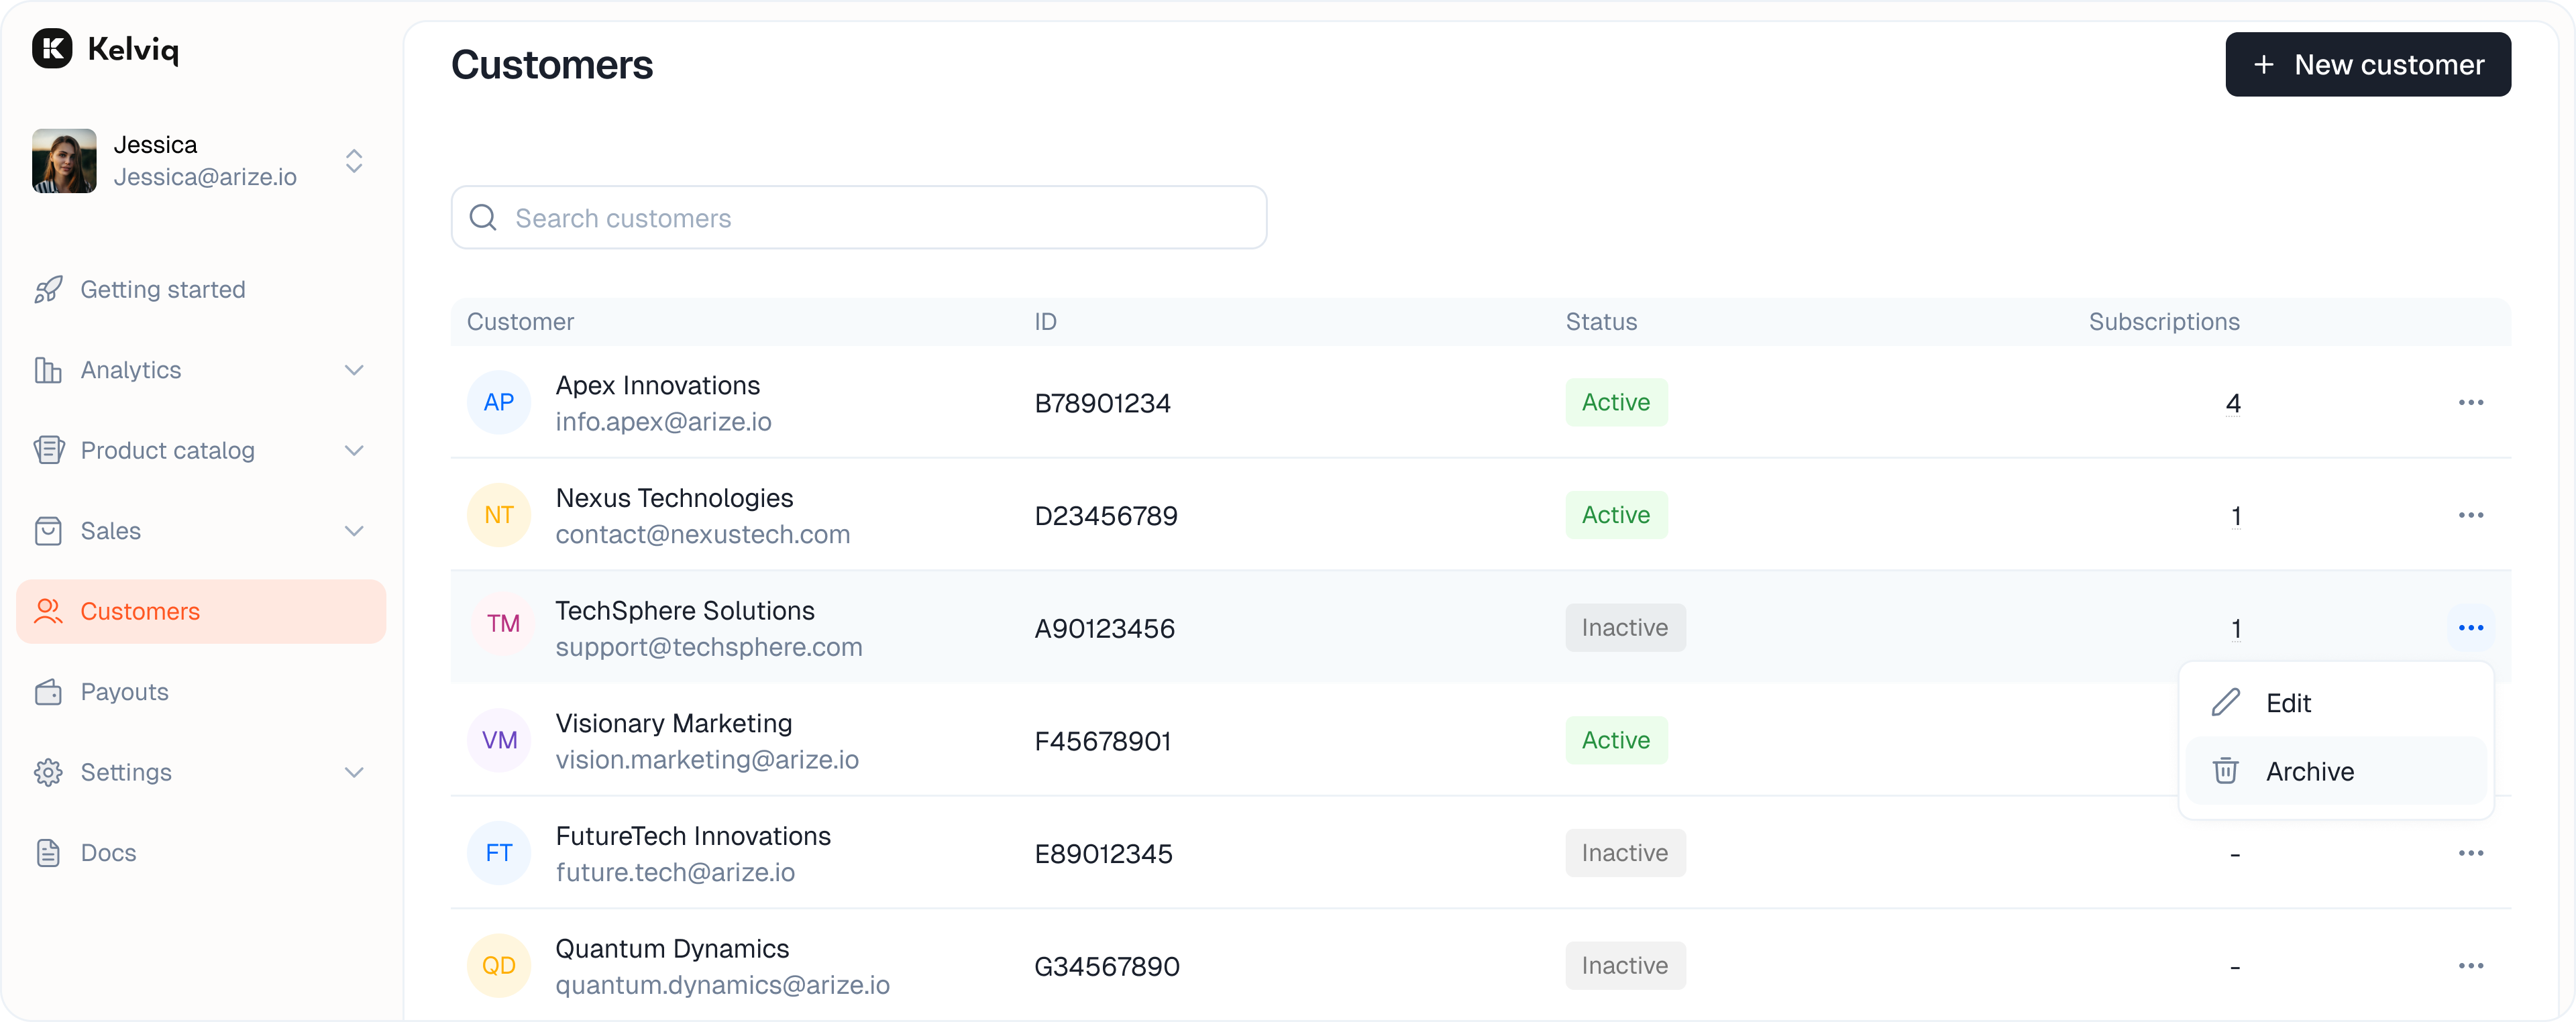
Customer details
Click on any customer row to open their full profile. This page holds the source of truth for that user. You can see their unique Billing ID and timestamps for when they joined or were last updated.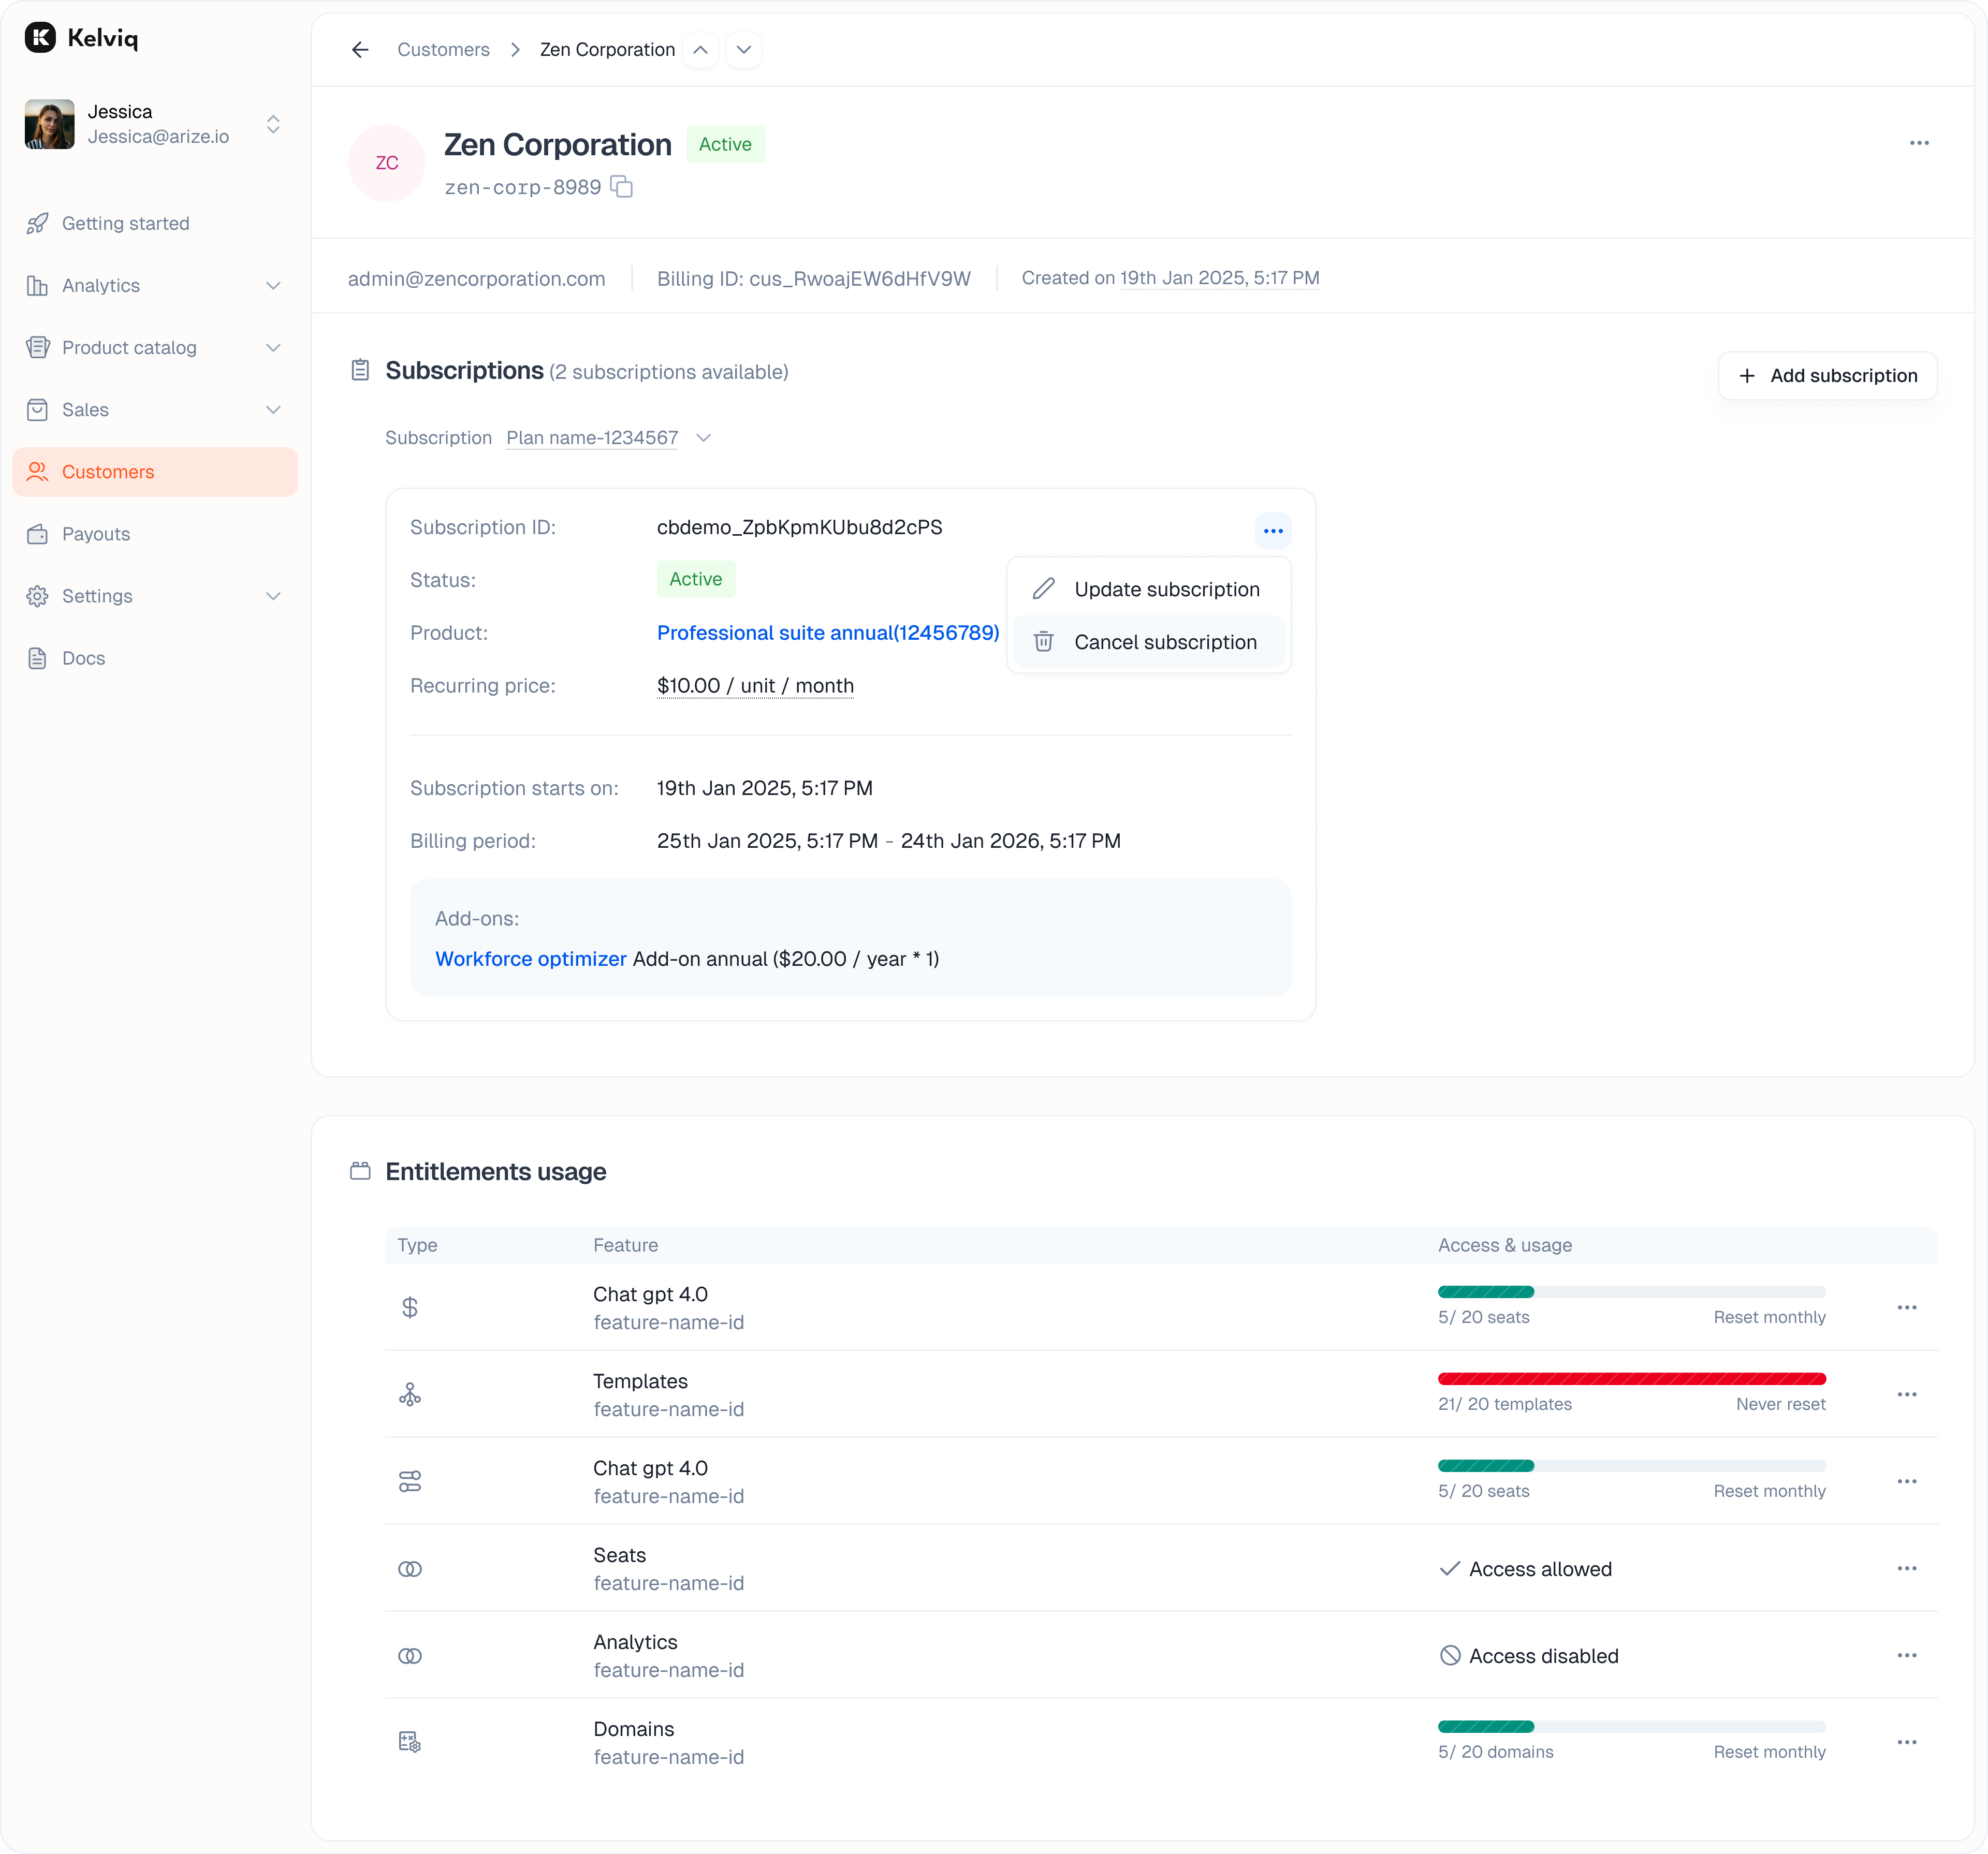
Subscriptions
This section lists active and past plans. It shows the status, such as Active or Canceled, and the relevant dates. Add a subscription You can manually subscribe a customer to a plan from here.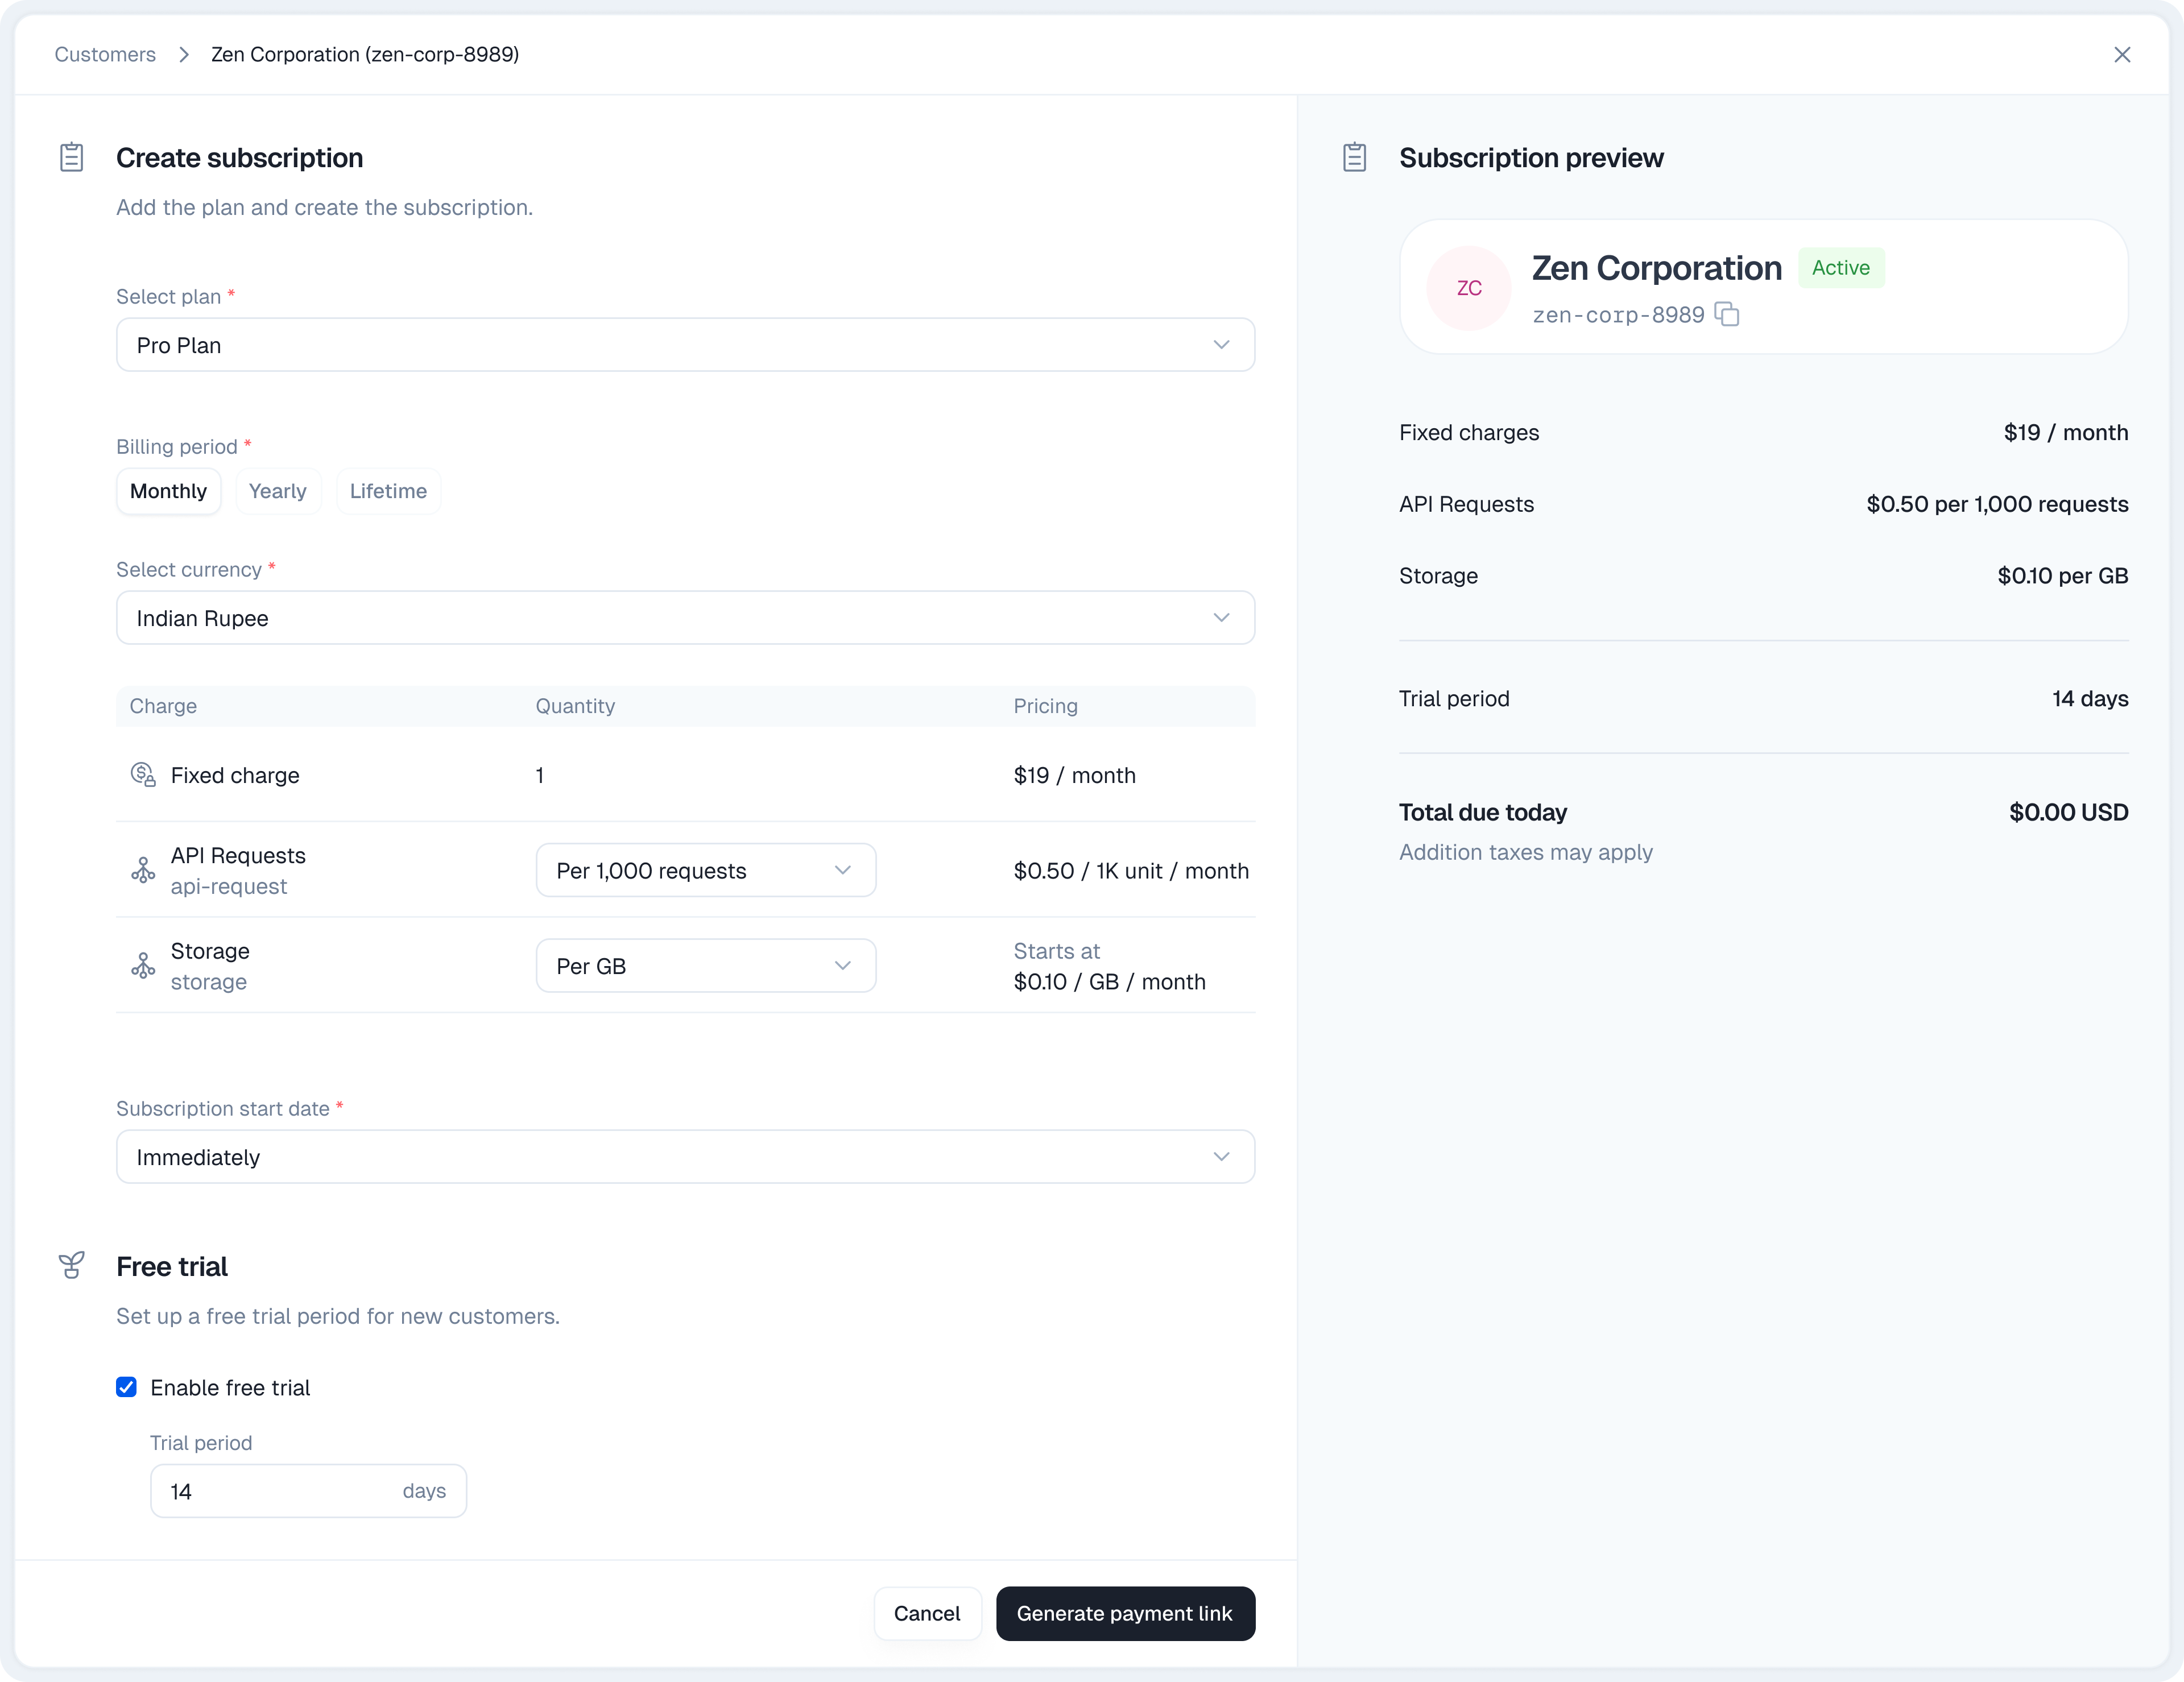
- Click Add subscription.
- Set the Billing period and Currency.
- Select the Features included in this specific sub.
- Set the Usage limits or allowances.
- Choose a Start date. You can also adjust the Free trial period here.
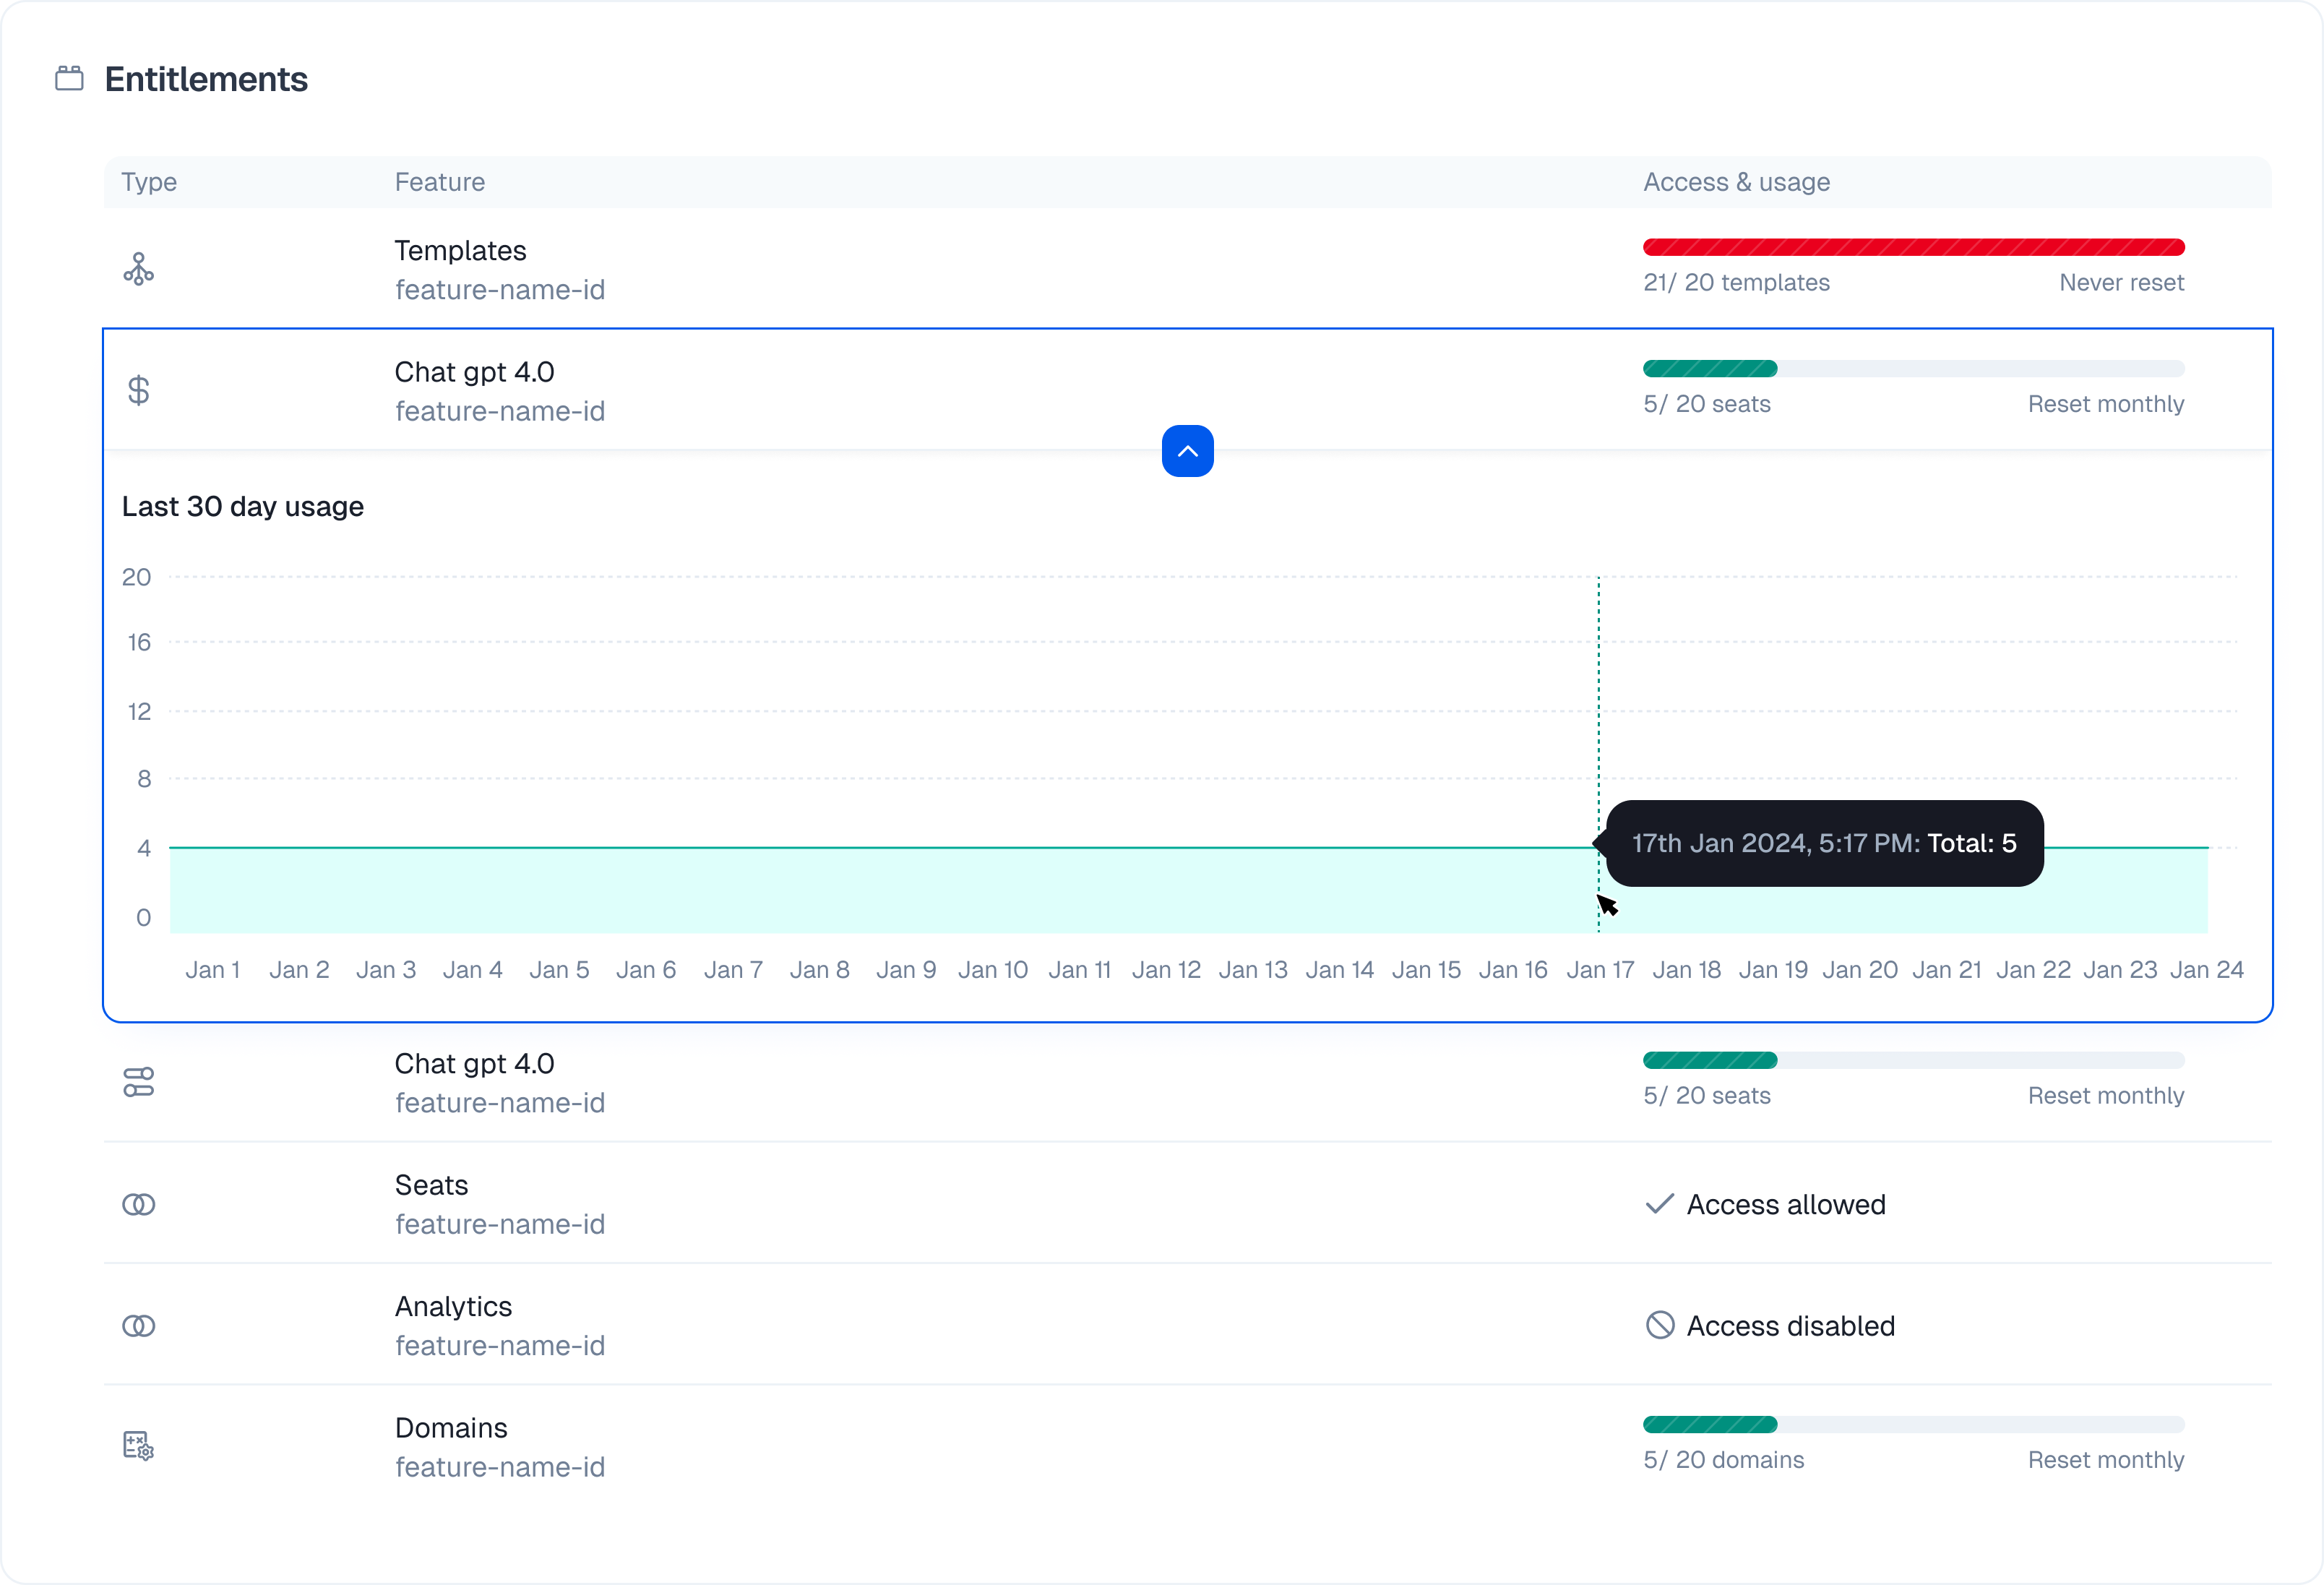
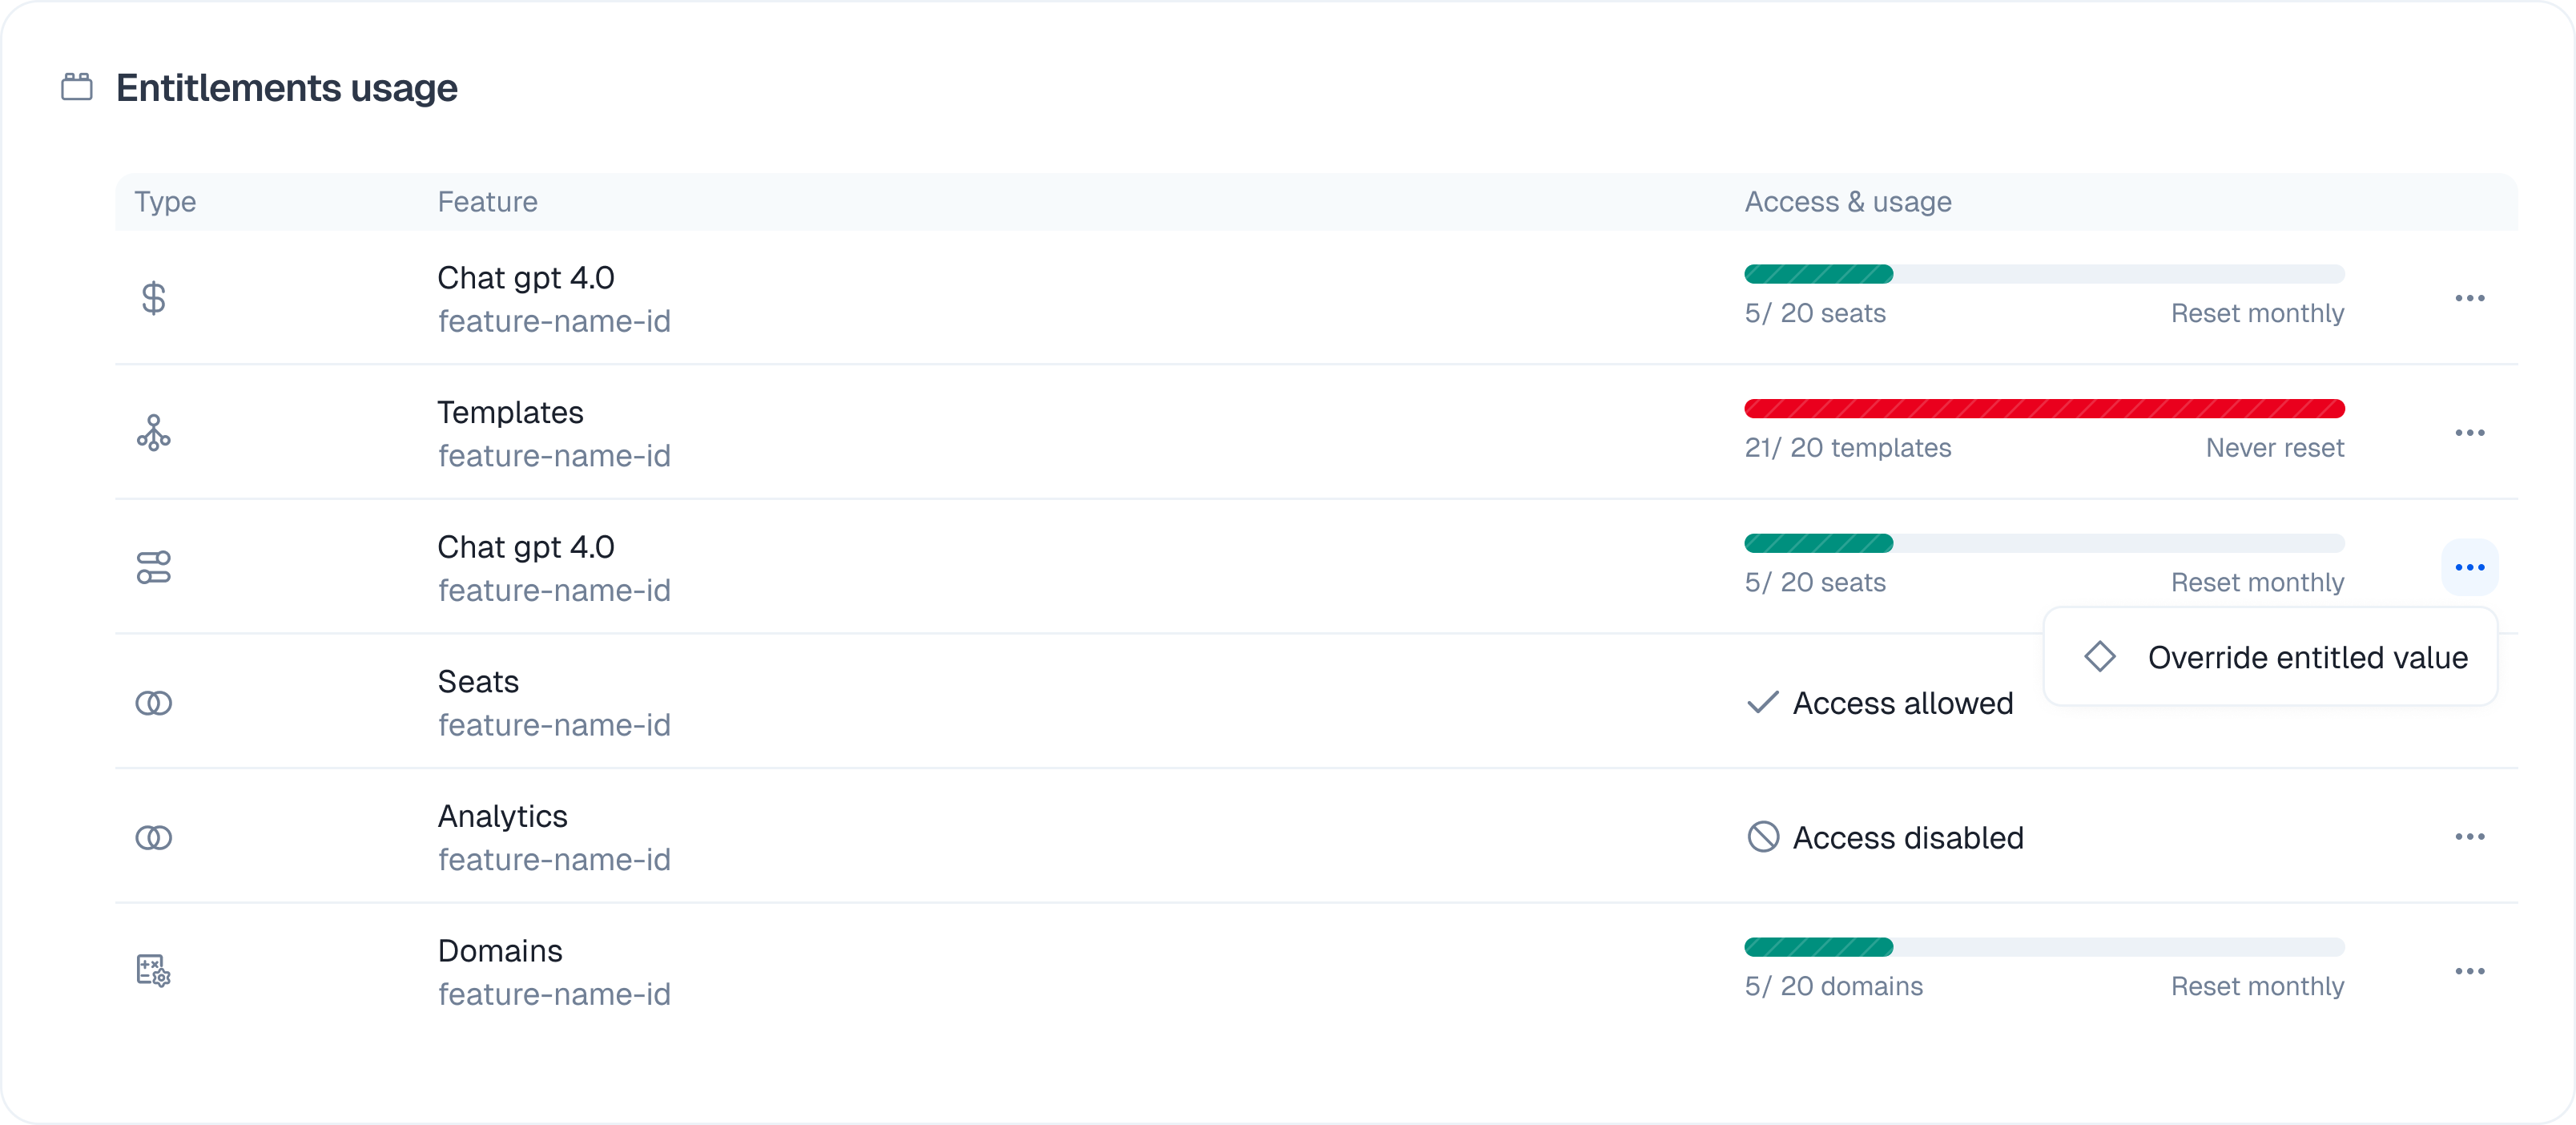
Entitlements
This view shows exactly what the customer can do right now based on their plan. Overrides You often need to make exceptions for specific users. You can do that here without changing the underlying plan.- Change the value of a specific feature.
- Update the usage limit for a metered feature.
Usage
This tracks consumption for usage-based billing.- Graphs show usage trends over time.
- Hover over the data to see exact numbers for specific periods.